


Every AI application that wraps an agent is a harness!
In LangChain’s Terminal-Bench experiment, changing only the harness (with the same model) moved a coding agent from ~30th place into the top 5: the harness, not the model, is what makes a coding agent good.
In the open-source course Building a Coding Agent From Scratch, you’ll build that harness from scratch in Python: Decode, a complete coding agent that grows lesson by lesson from a bare agent loop into a swarm of remote agents running in parallel in the cloud.
Why? You’ll be able to engineer custom harnesses for your own AI products (the skill behind that leaderboard jump), and you’ll understand what Claude Code and Codex actually do under the hood, turning you into a power user.
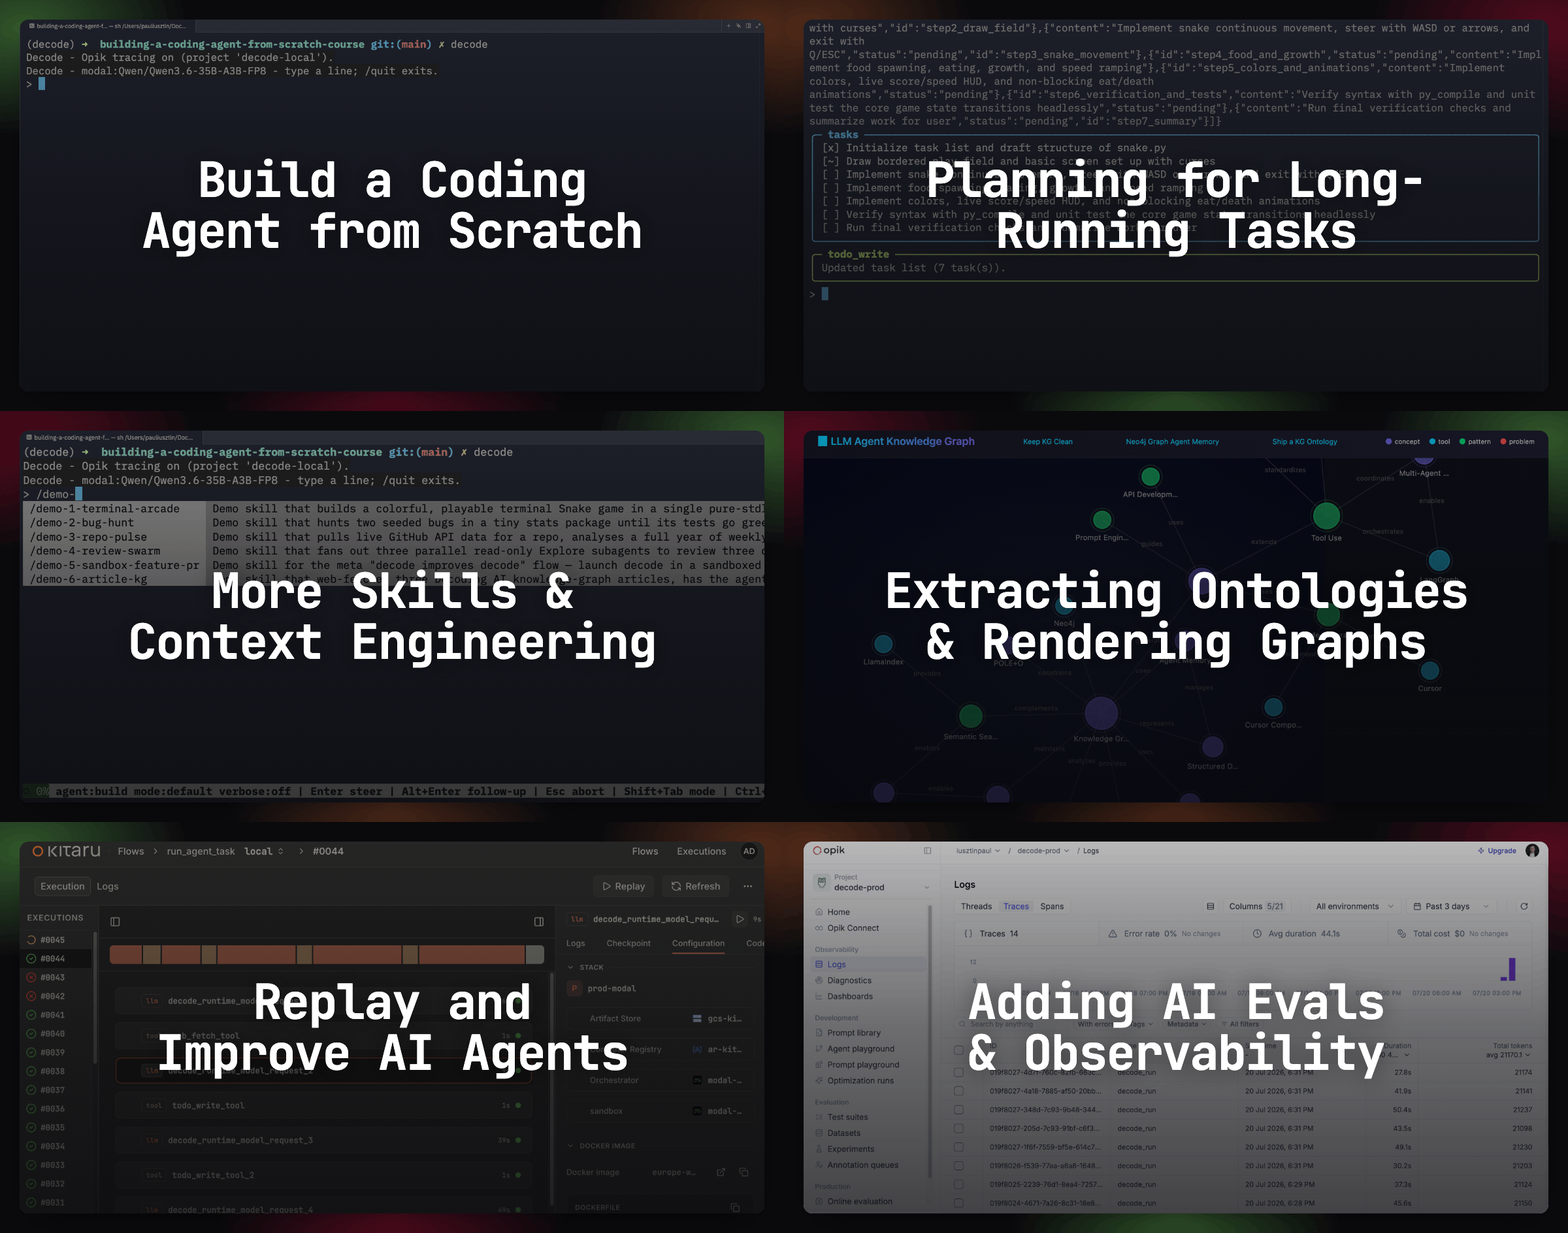
Lessons:
Building a Coding Agent From Scratch ← you are here
Special thanks to Modal, Opik (by Comet), and Kitaru (by ZenML) for sponsoring this open-source course and keeping it free!
Lesson 1: Building a Coding Agent From Scratch

In a test run by LangChain on Terminal-Bench, changing only the harness (same model throughout) moved a coding agent from roughly 30th place into the top 5. The model isn’t what makes a coding agent good. The harness is. So that’s what we’ll build from scratch. A coding agent harness.
When I first started digging into coding agents, I couldn’t tell where the agent ended and the harness began. I wanted past that black box, so in the past months I’ve researched how the most popular coding agent tools work under the hood: Claude Code (via its leaked source), OpenCode, Pi, and Aider.
That harness is the only layer you can actually engineer. And that’s why I think building your own coding agent harness from scratch is the best way to understand both how to better use coding agents to become a power user and how to build your own custom harnesses for AI agents.
During my research, I’ve built my own replica: “Decode: The Coding Agent”. Now, I want to show you how to build your own.
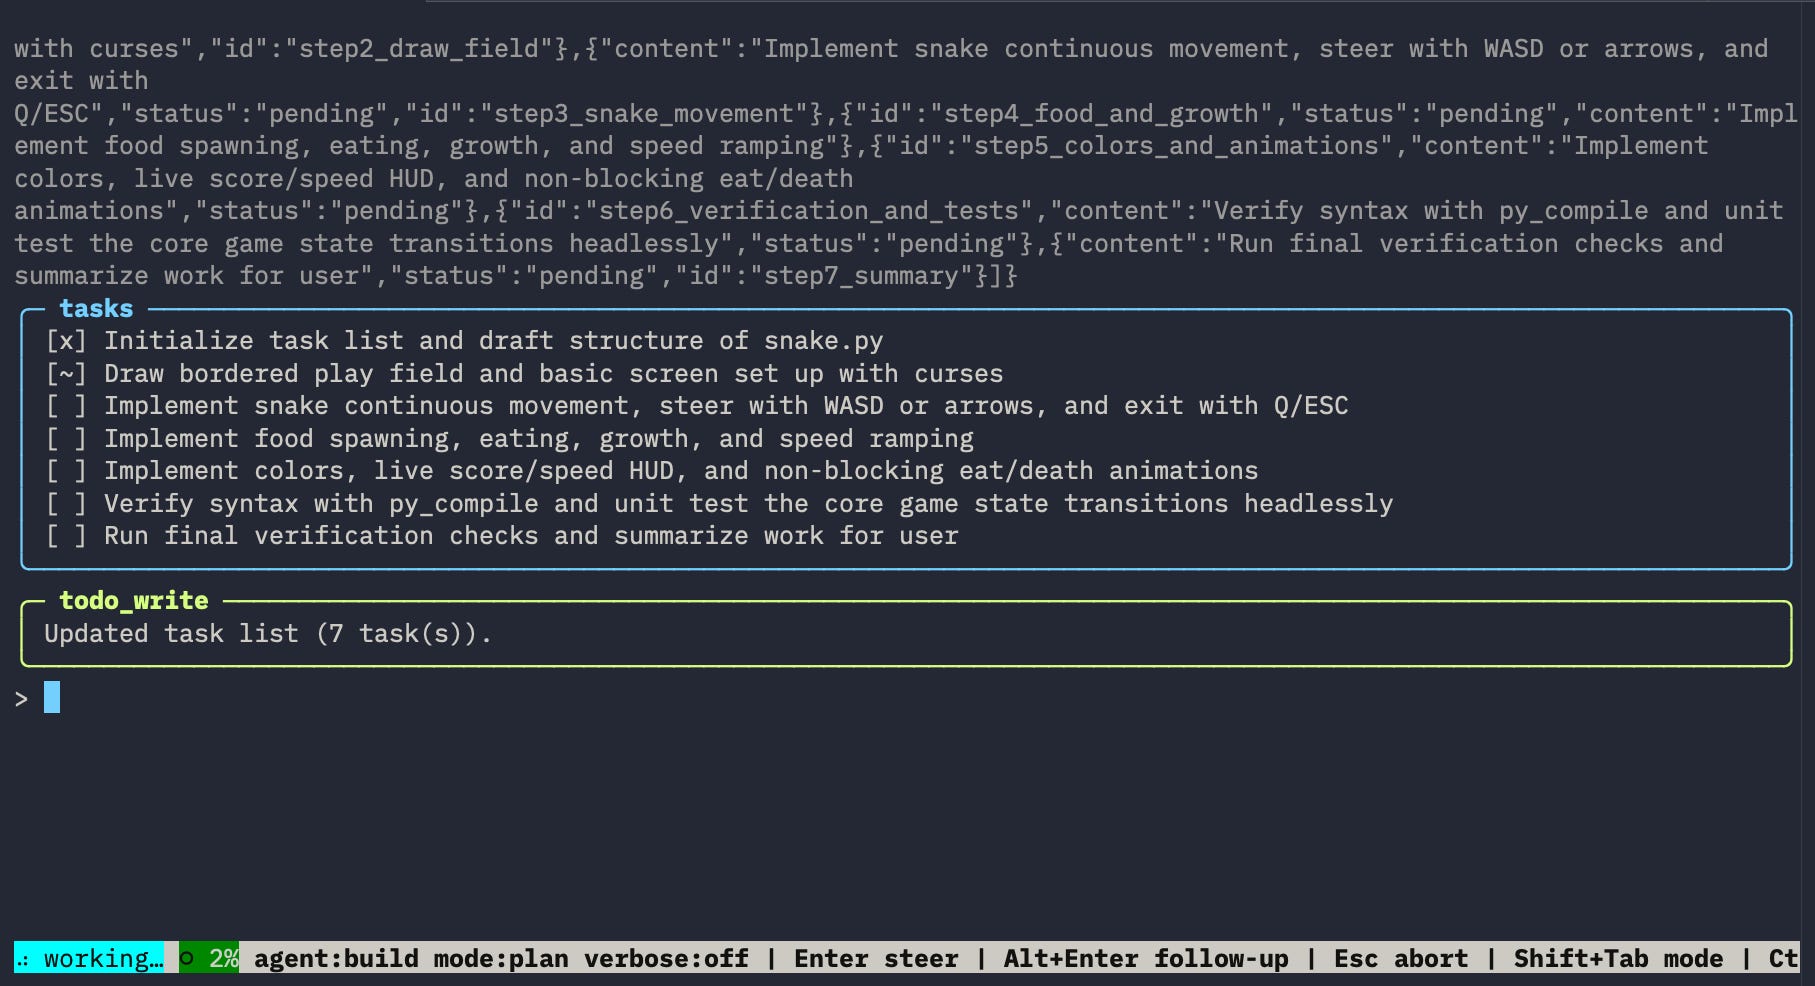
I don’t mean a simple LLM with some tools in a loop, which is just the good old ReAct pattern. I mean building the whole coding harness from scratch. Build a coding agent once, and you’re equipped to build a custom agent for any use case.
The truth is that adding custom business logic to existing open-source harnesses such as Pi, DeepAgents by LangChain, or Pydantic AI Harness is not that hardcore. But to know what to add based on the internals of these harnesses is extremely important. Those are fundamentals. The secret sauce that still makes AI Engineers valuable.
In this 8-lesson series, you’ll build a complete coding agent called Decode from scratch in Python. It runs as a CLI for interactive use or as a remote headless agent that lets you run a swarm of agents in parallel on a cloud platform like Modal for automation, such as picking up tasks from the backlog or handling PR reviews.
You’ll learn how to implement all of that in 3 phases. First, we will build the agent loop using Pydantic AI, powered by open-source models on Modal, OpenRouter, or Gemini, leveraging their free credits.
Then we will build the harness around the loop, adding context engineering, sandboxing in Docker and Modal, memory, skills, compaction, subagent support, and more! All the good stuff known as harness engineering.
Finally, the boring stuff that makes you a senior AI engineer: adding observability and building a custom evaluation harness similar to Harbor (the framework used to compute Terminal-Bench and DeepSWE, two of the most popular agent benchmarks). During this, we will implement a custom benchmark (because evaluating agents on public benchmarks never aligns with your business goals), agent regression tests via Opik, and trace replay via Kitaru.
Before getting into the implementation, I want to kick off this lesson with the most fun part: the coding agent's system design.
Let’s trace the architecture end to end, following one request through every component.
The High-Level System Design
You pass a coding agent a request — “fix the bugs that make the unit tests fail” — and it loops: explore the codebase, run the tests, read the feedback, edit the code, repeat. The input is your request, while the repository is the state of the codebase. The output is tested changes done to the repo. Everything in between is the harness.
We are pretty familiar with this process. But how does it work?
At the center sits the headless harness: no interface of its own. It exposes a module that interfaces connect to. At the core, it runs the agent loop every harness shares: the LLM picks an action (a tool call — run the failing test suite), the tool executes and returns an observation (2 failing tests, expected vs actual), and the loop feeds it back. Everything reads from and writes to the context window (the state of the LLM).
To highlight that the harness is independent from the LLM, we wanted to implement multiple LLM providers. The loop is powered by an LLM provider module that to support open-source models we implemented it with Modal (for self-hosting) and OpenRouter (for APIs). Also, we added support for Gemini for their free tier. Modal is the most interesting as it allows us to either host standard open-source models or easily host our own fine-tuned models on top of their serverless infrastructure.
That cycle lets the agent correct itself: implement the code, run or compile it, read the error, fix it — or catch the mistake before anything runs, with a Language Server Protocol (LSP) server flagging broken syntax the moment an edit happens. The tighter these feedback loops, the faster the agent converges on working code. The LSP server (we used ty - made by Astral’s - the guys behind uv and ruff) is the cheapest way to get feedback on code changes.
Along with the LLM providers and LSP server, the harness contains 4 more essential modules: Memory, Skills, Sandbox, and Permissions. Essential for context engineering and security.
The context window of the LLM is a budget. The conversation accumulates in the window until it stops fitting or performance degrades. Remember that too much context confuses the model, known as context decay. Every observation the loop feeds back spends from the same finite budget. Hence, the harness needs to implement compaction techniques such as summarization, truncation, or just clearing the window.
How do we interact with the headless harness? It has two core interfaces: interactive mode, a terminal user interface (TUI) connected to a single live session, and remote mode, where an agent runtime (Modal) runs N headless harnesses in parallel as serverless functions.
On top of everything, we have the AI evals & observability layer, powered by Opik and Kitaru, that records every model call and tool call and turns a bad prompt tweak into a failing regression score before your users feel it in production or a signal used to improve the agent.
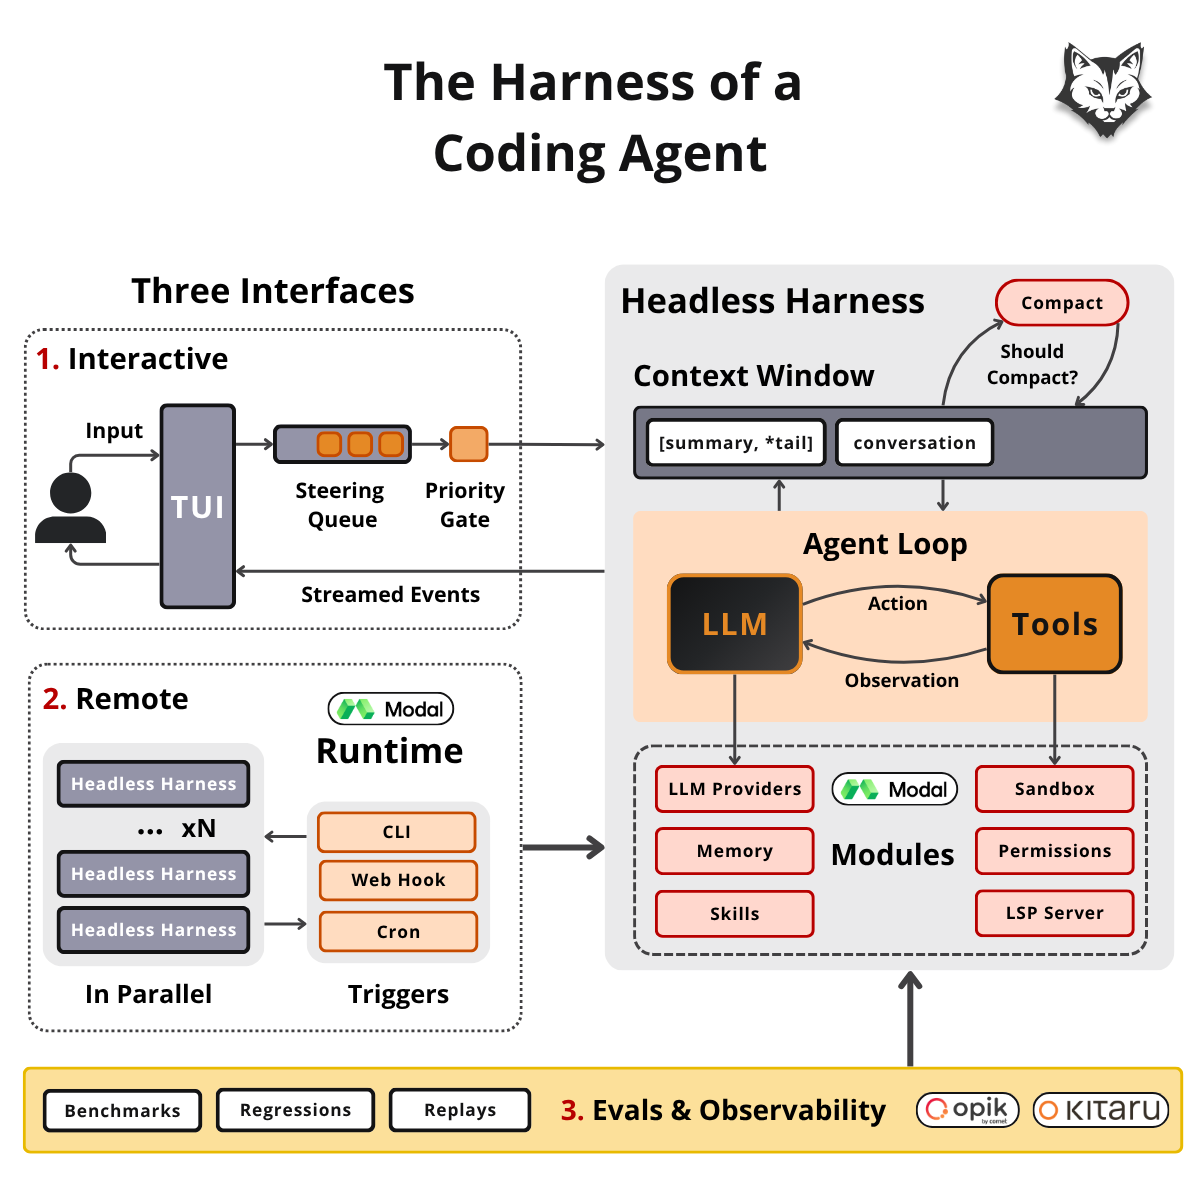
Here is how all the components fit together:
You type the request into the TUI. The input enters the steering queue through the priority gate and into the session’s context window. The loop sends the window (with the available tools) to the model through the LLM provider. The model answers with an action — grep for the failing assertion, then edit stats.py. Permissions check whether it can execute the tool, the tool executes inside the Sandbox, and the observation is added back into the context window. The loop repeats until the model stops calling tools. During the loop, events stream back to your terminal in real time via an async generator.
Next, let’s zoom into the agent loop, where the agent ends and the harness begins- the boundary that defines this entire series.
The Headless Harness & The Agent Loop
The agent itself is a Pydantic AI agent. A ~20 line definition that composes the model, the tools, the output type and iterates until the model stops calling them. The snippet below is the distilled version of Decode’s loop:
from dataclasses import dataclass
from pydantic_ai import Agent, DeferredToolRequests

@dataclass
class AgentDeps:                # the harness state injected into every tool call
    cwd: Path                   # the repo the tools operate on
    emit: EventSink             # streams events to whatever interface is attached
    gate: PermissionGate        # allow / ask / deny, per tool call
    resolve_permission: PermissionResolver  # asks the human when the gate says "ask"

agent = Agent(
    build_model(settings.llm_provider),       # gemini | openrouter | modal
    deps_type=AgentDeps,
    output_type=[str, DeferredToolRequests],   # a turn ends as a final answer (str),
)                                              # or as tool calls paused for approval
register_tools(agent)                          # read, edit, bash, grep, ...

async with agent.iter(prompt, message_history=history) as run:
    async for node in run:                     # model request → tool calls → repeat
        stream_events(node)                    # everything else is the harness
Through the AgentDeps dataclass we inject harness related components into the loop. The tools are never aware of the interface: TUI or headless. This is what I like to call “a practical clean architecture”, where you are obsessive about separating the serving and infrastructure layers from your core business logic via interfaces and composition.
output_type names the only 2 ways a turn can end: a final answer, or tool calls suspended mid-turn waiting for human input.
We will go into all the details about the agent loop, explaining how we hook multiple closed-source/open-source models, the tools and other deps into the loop, in the next article.
These ~20 lines are the entire tool-calling LLM agent. The thing people call “the agent” ends here. Everything we build on top of it across 8 lessons is the coding harness.
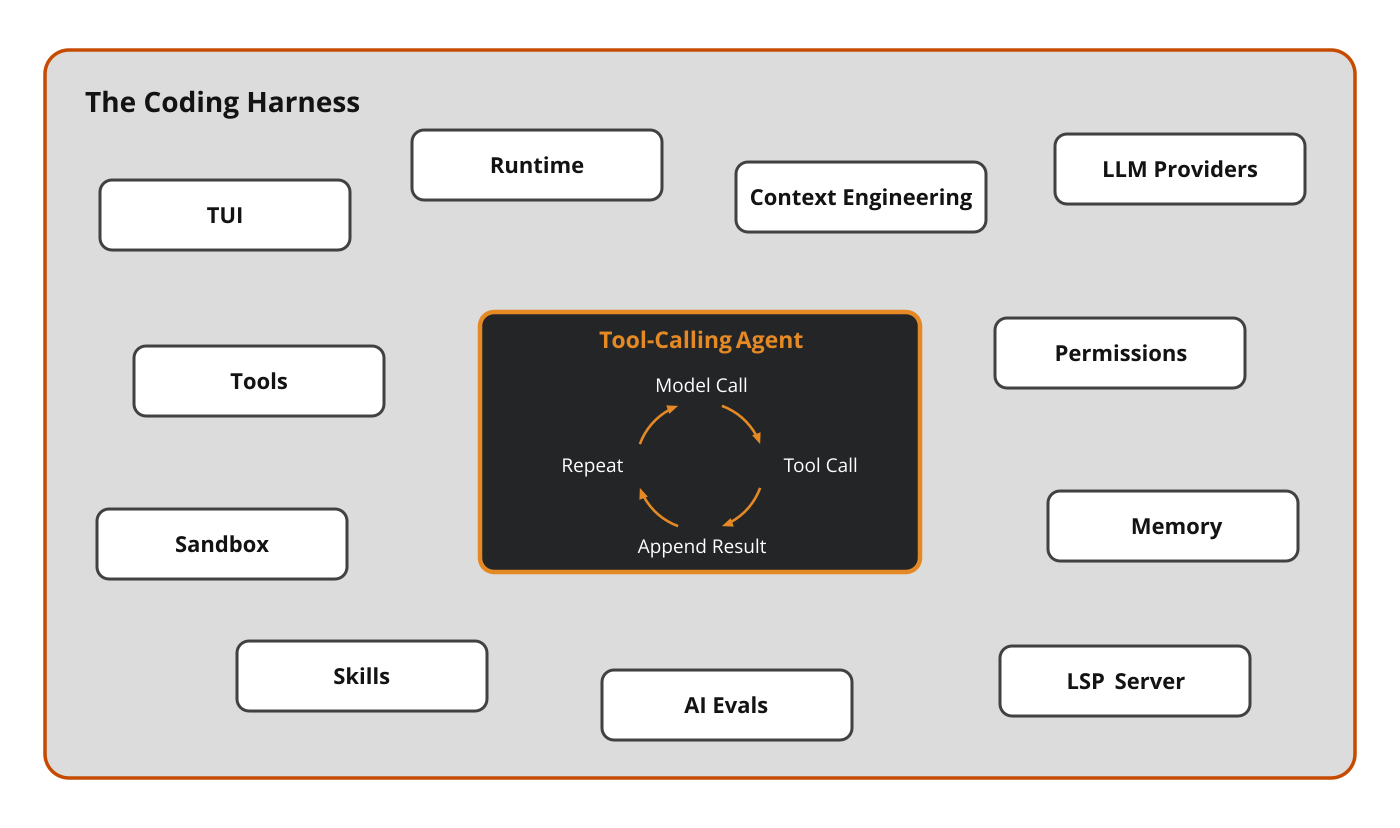
Pydantic AI is a thin layer over the model APIs: typed tool definitions, streaming, structured outputs, with no heavy framework between us and our own logic. What makes this a coding agent is the tools: read and edit files, run bash, search the codebase, manage a task list, fetch the web, ask the user a question, and spawn subagents. Plus, the LLM specializes in coding. Anthropic is well known for continually optimizing their models for coding tasks. That’s why with every release their models get worse and worse at writing, while better and better at coding.
Still, almost everyone already uses coding agents such as Claude Code or Codex for completely different use cases (including myself): productivity, content creation, finance, sales, marketing. The line between a coding agent and a general-purpose agent is blurry, as any agent needs to natively interact with your computer. How would a harness specialized in writing look? Other than making the LLM sound better. Which is not the harness!
On top of the agent loop, we have 6 modules + compaction that transform the agent loop into a headless harness.
The Six Modules + Compaction
LLM Providers — Decode ships with 3: Modal to serve any type of open-source models (pre-configured or your own fine-tuned version), deployed as Modal endpoints — serverless GPU web endpoints that put the model behind a URL the harness calls like any hosted API, OpenRouter to reach any hosted model behind one API, and Gemini for Google’s free tier for following along. Also, by implementing three providers we can showcase how to swap the model only with a config change, not a rewrite. The loop should never know which model is powering the harness. Clean architecture, remember?
Sandbox — an agent that runs bash can break things. We wrap the bash and file-I/O tools to execute inside a sandbox (Docker locally, Modal Sandboxes remotely) instead of on your machine.
Permissions — the permission layer is the most important guardrail: it asks you before running every action, or only the risky ones, depending on the mode. For example, it pauses before a destructive bash command like rm -rf and waits for your approval. This is similar to Claude Code’s default, edit, and auto modes.
Memory — the iconic AGENTS.md that carries your project instructions plus a MEMORY.md that encodes what the agent learns (e.g. “run the tests with pytest -x, never the full suite”). Plain files, deliberately no memory database and no codebase index: the repo is explored dynamically with grep. Just-in-time reads beat a stale heavy index.
Skills — the omnipresent skills feature that encodes reusable workflows loaded only when invoked, so the context window doesn’t get bloated with all your instructions at once. The repo already ships a set of skills under .decode/skills/ that you can try out of the box.
LSP Server — a key component of a coding agent. It keeps an index of all your variables and functions. The loop gets syntax and semantic information about the codebase through 2 channels instead of brute-forcing through it or waiting for the code to run. On demand, the model asks where a symbol is defined, who calls it, what its real contract is, and what’s broken in a file. The model gets 1 precise file:line answer. After each edit, a fast syntax checker feeds its findings back into the loop. The agent fixes a type error in the same turn, before running/compiling any code. The cheapest feedback loop in the system.
Compaction — not a module but a behavior of the harness itself that helps keep the context window as small as possible. The most iconic strategy is to compact the window once it goes over a threshold, squashing the window’s old head into a summary + keeping the recent interactions fresh: [summary, *tail]. You can also call this manually via /compact or simply clean the whole context window via /clear.
That’s the headless harness. Now, let’s plug it into the interfaces you use every day.
The Interactive Mode
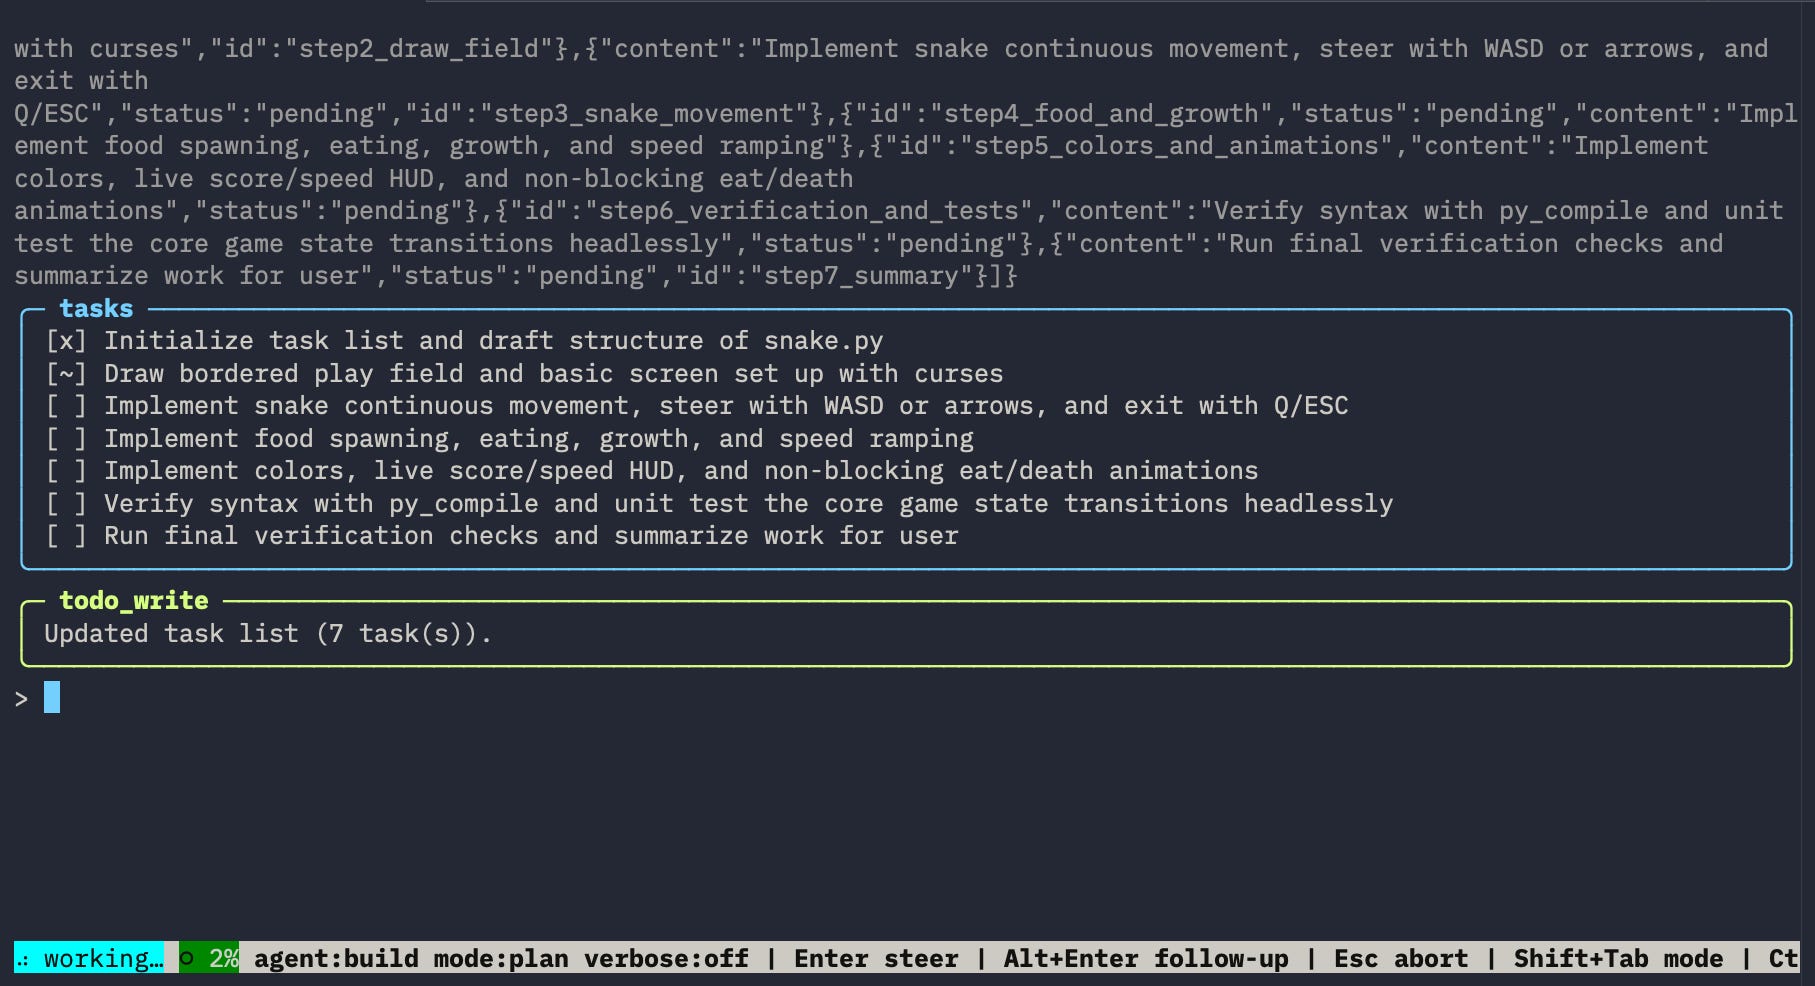
The first is the TUI: the interactive mode, a terminal interface wired directly to one live session of the headless harness, in memory, in the same process.
We built it in Python, where prompt_toolkit handles input and Rich handles output of the terminal experience. It’s append-style, like a conversation log, rather than a full-screen app. Keystrokes go in, and the session’s event stream comes back in real-time via Python generators: streamed text, tool calls, approval prompts.
Why Python? To be honest, we picked it mostly for teaching purposes.
From my recent poll, I realized that all my audience knows Python. So this makes it accessible to you. But if I were to ship this for real, I’d reach for TypeScript (the language claude-code, OpenCode, and Pi chose) or Go, which compiles to one tidy binary. Still, Aider proves Python can carry a serious coding agent.
And in this series we will focus on the “why”, the design and architecture decisions. Thus, the programming language is not that important and you can easily swap it out for another language.
The steering queue
What happens when you send a new command and the agent is already mid-task?
Injecting it the moment it’s sent would corrupt a tool call already in flight. Ignoring it makes the agent unsteerable. Every serious harness hits this: Pi drains steering messages mid-turn but follow-ups only at the turn boundary, and claude-code ranks queued input so user messages never starve.
Decode’s answer is the steering queue + priority gate. Input is buffered the instant it arrives into the steering queue and injected only at a safe boundary: before the next model call, never mid-tool-call. The gate decides how to process the messages from the queue: steer now, answer later, or abort.
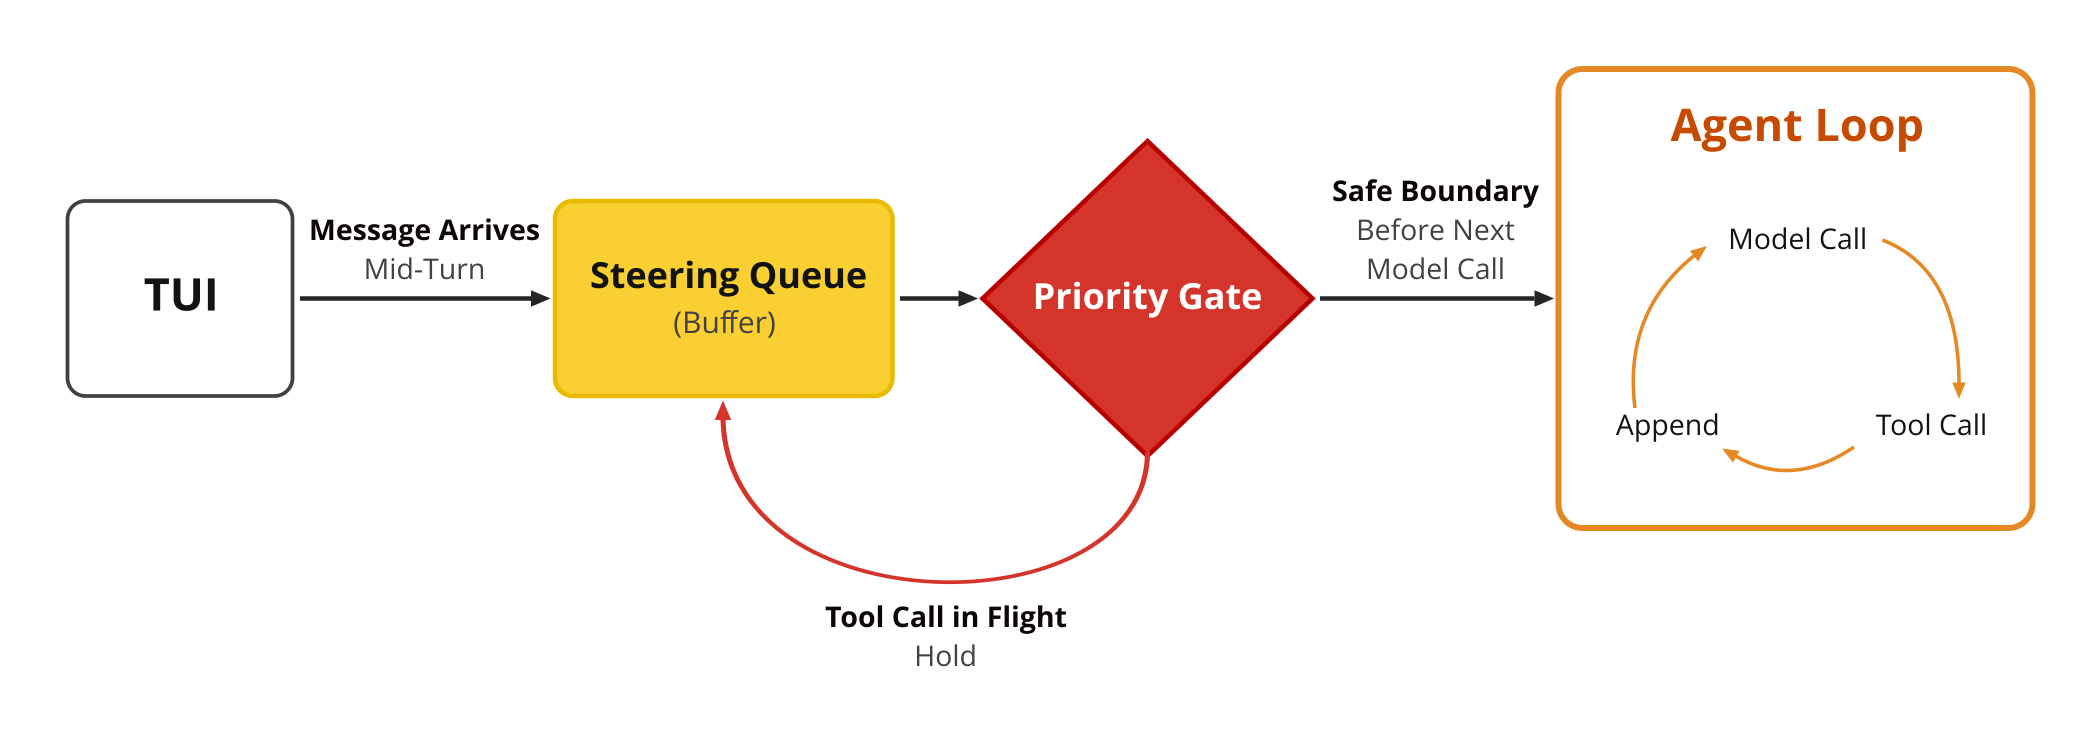
The steering queue can be a simple in-memory FIFO queue. No need for a complex queue infrastructure like RabbitMQ.
Try it out
You can already clone the Decode repository and try it out for yourself.
The repo has all the setup instructions. There are $0 costs to try it out. We recommend starting with Modal, which offers $30 in free credit every month.
The experience is similar to what you already know: you run decode in any repo and the TUI opens as a fresh session.
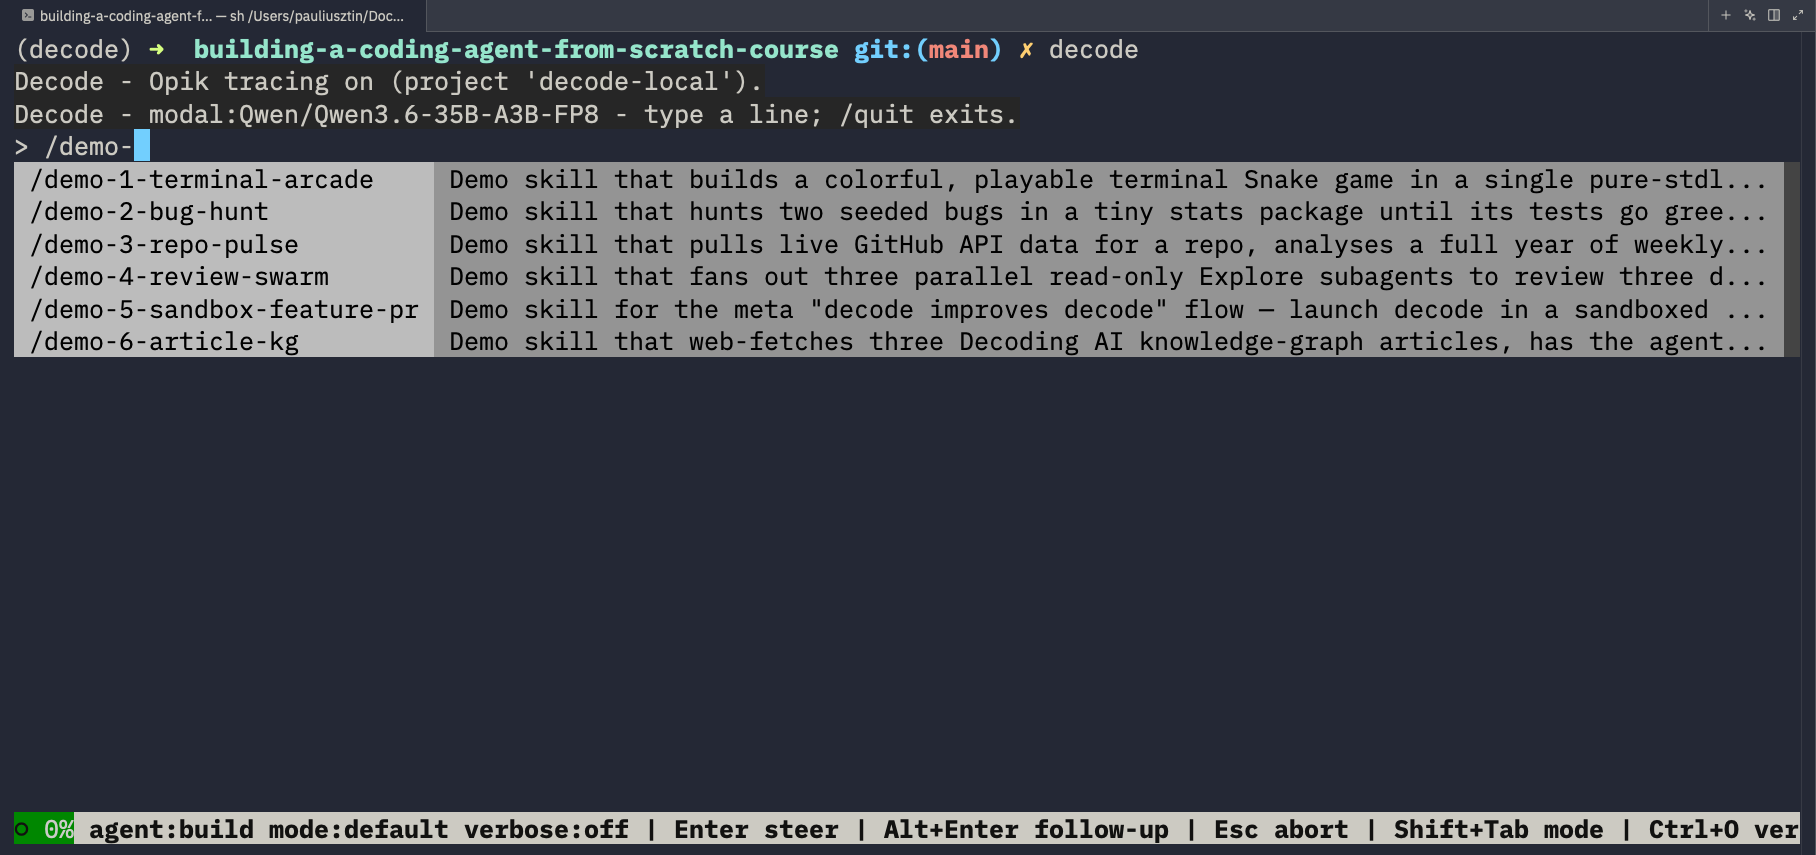
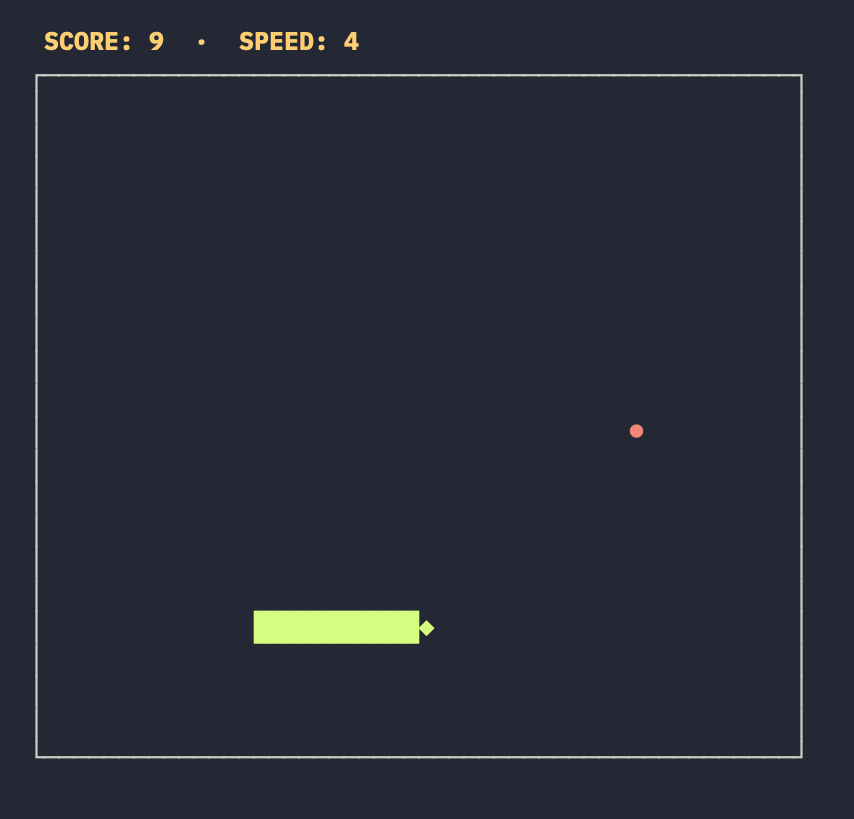
We bundled together a few demo’s as skills under .decode/skills/, so you can easily try out the coding agent with 0 friction:
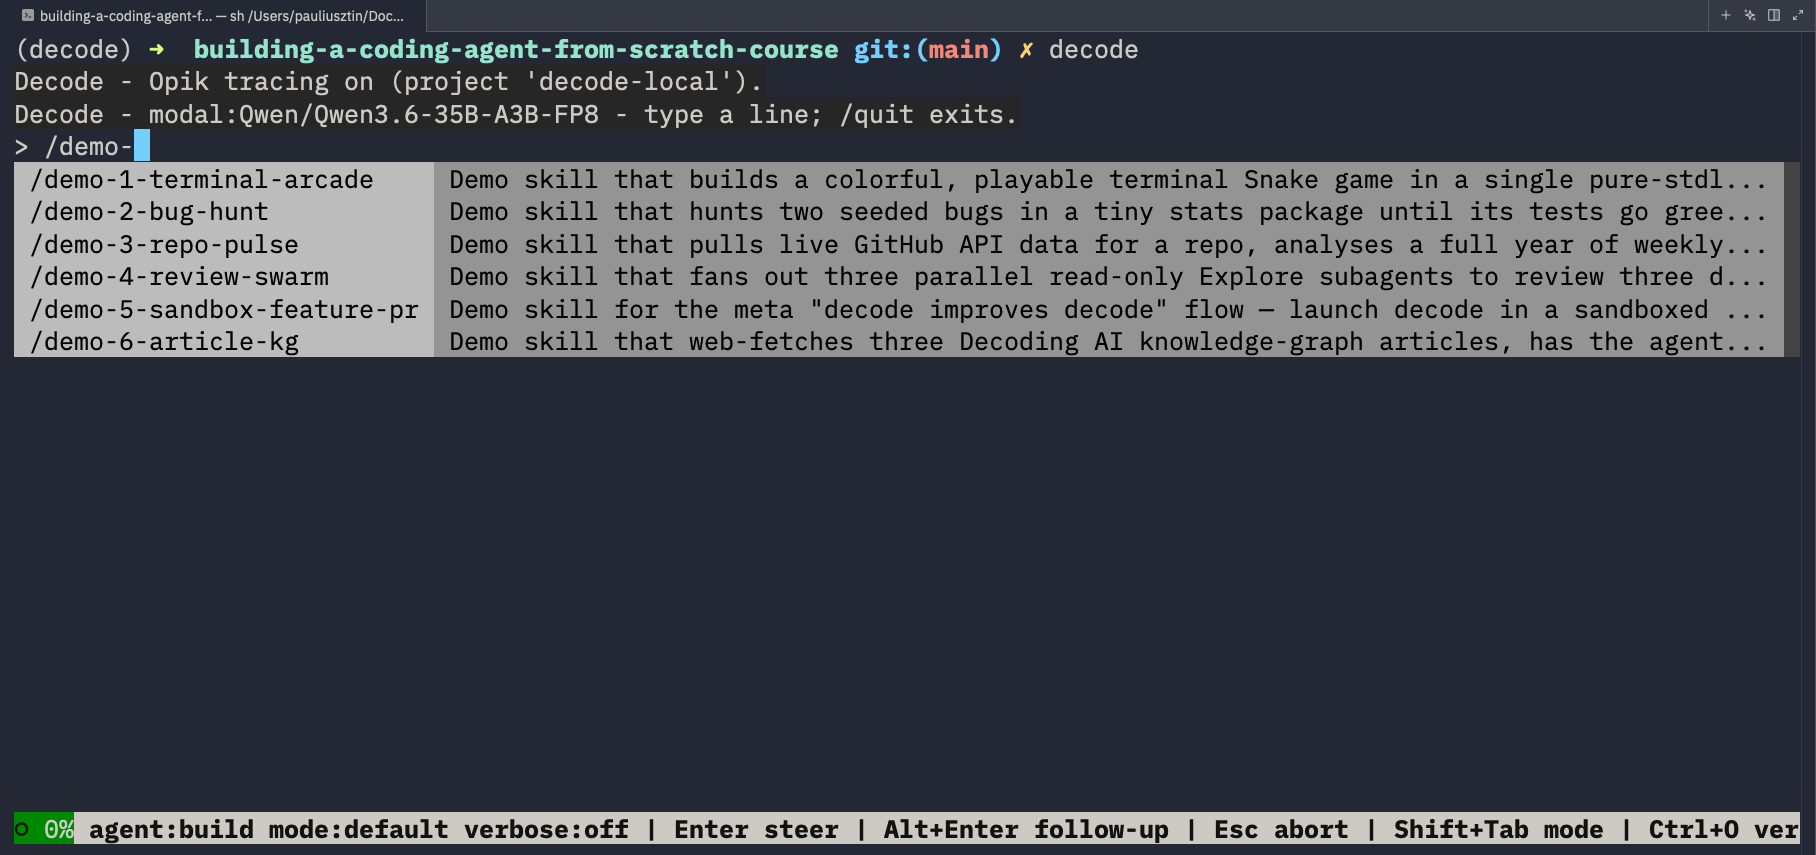
.decode/skills/, listed inside the TUI.Such as creating a snake game:
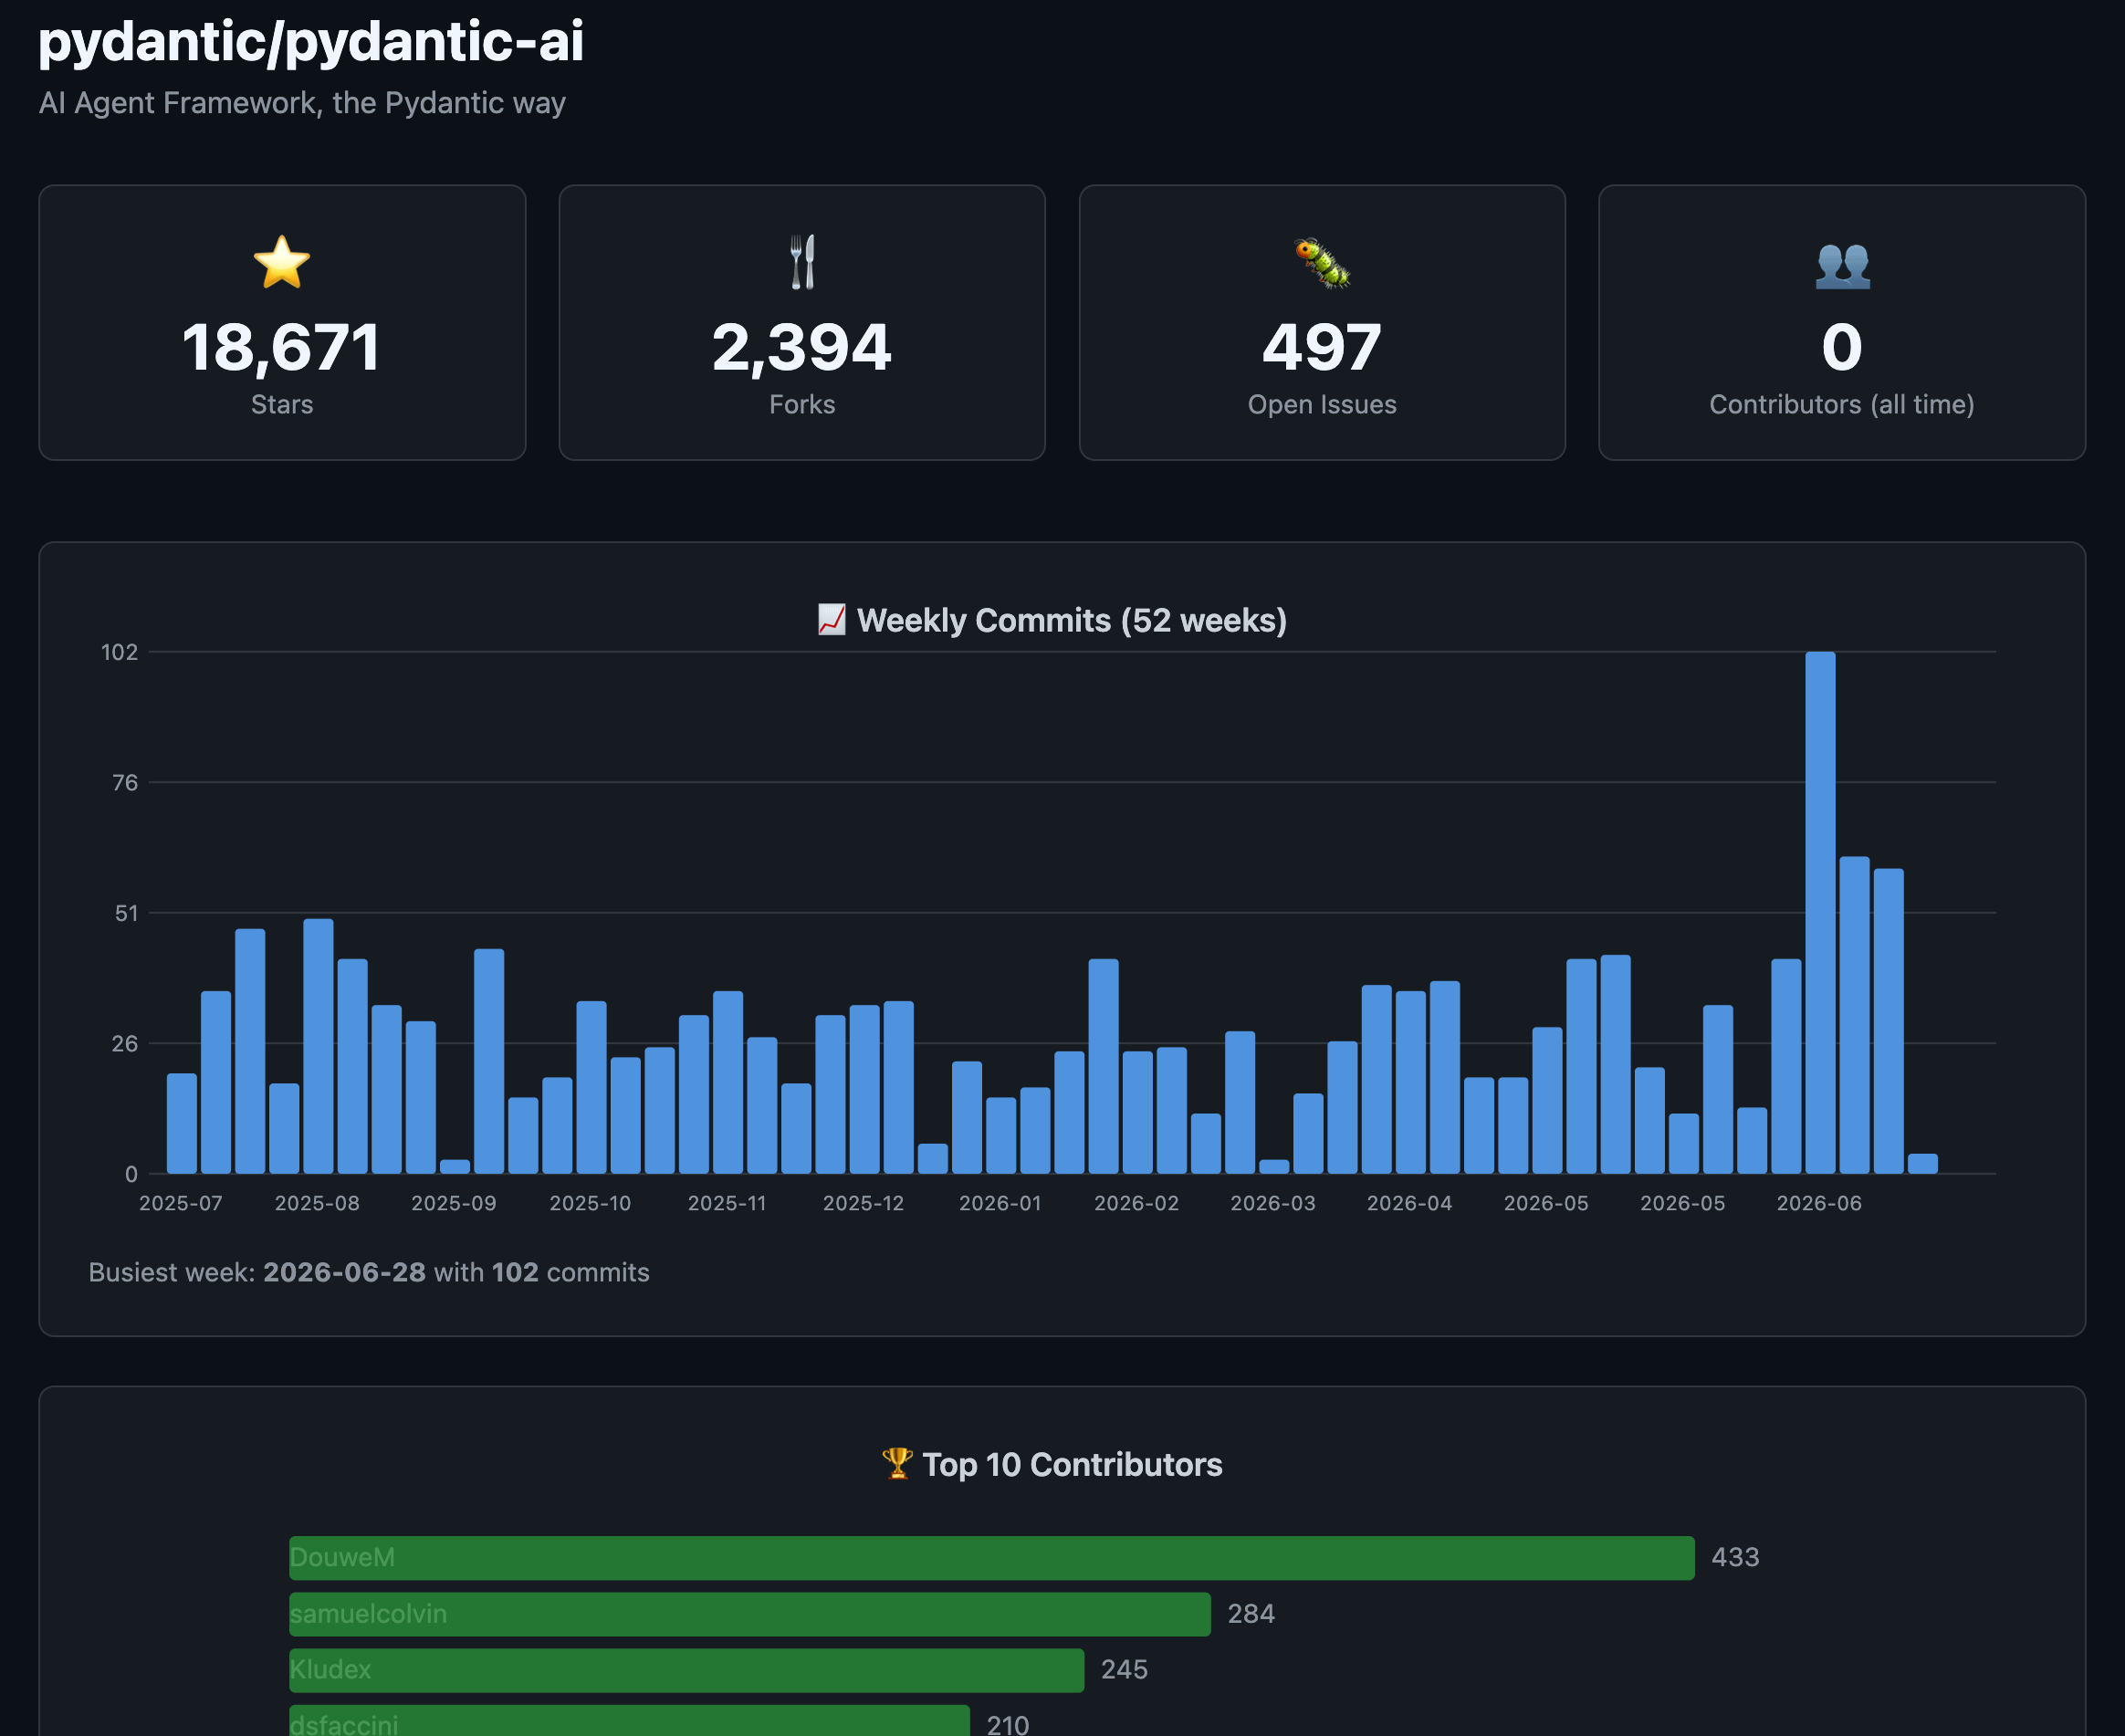
Fetching data from a GitHub repo and rendering a web page:
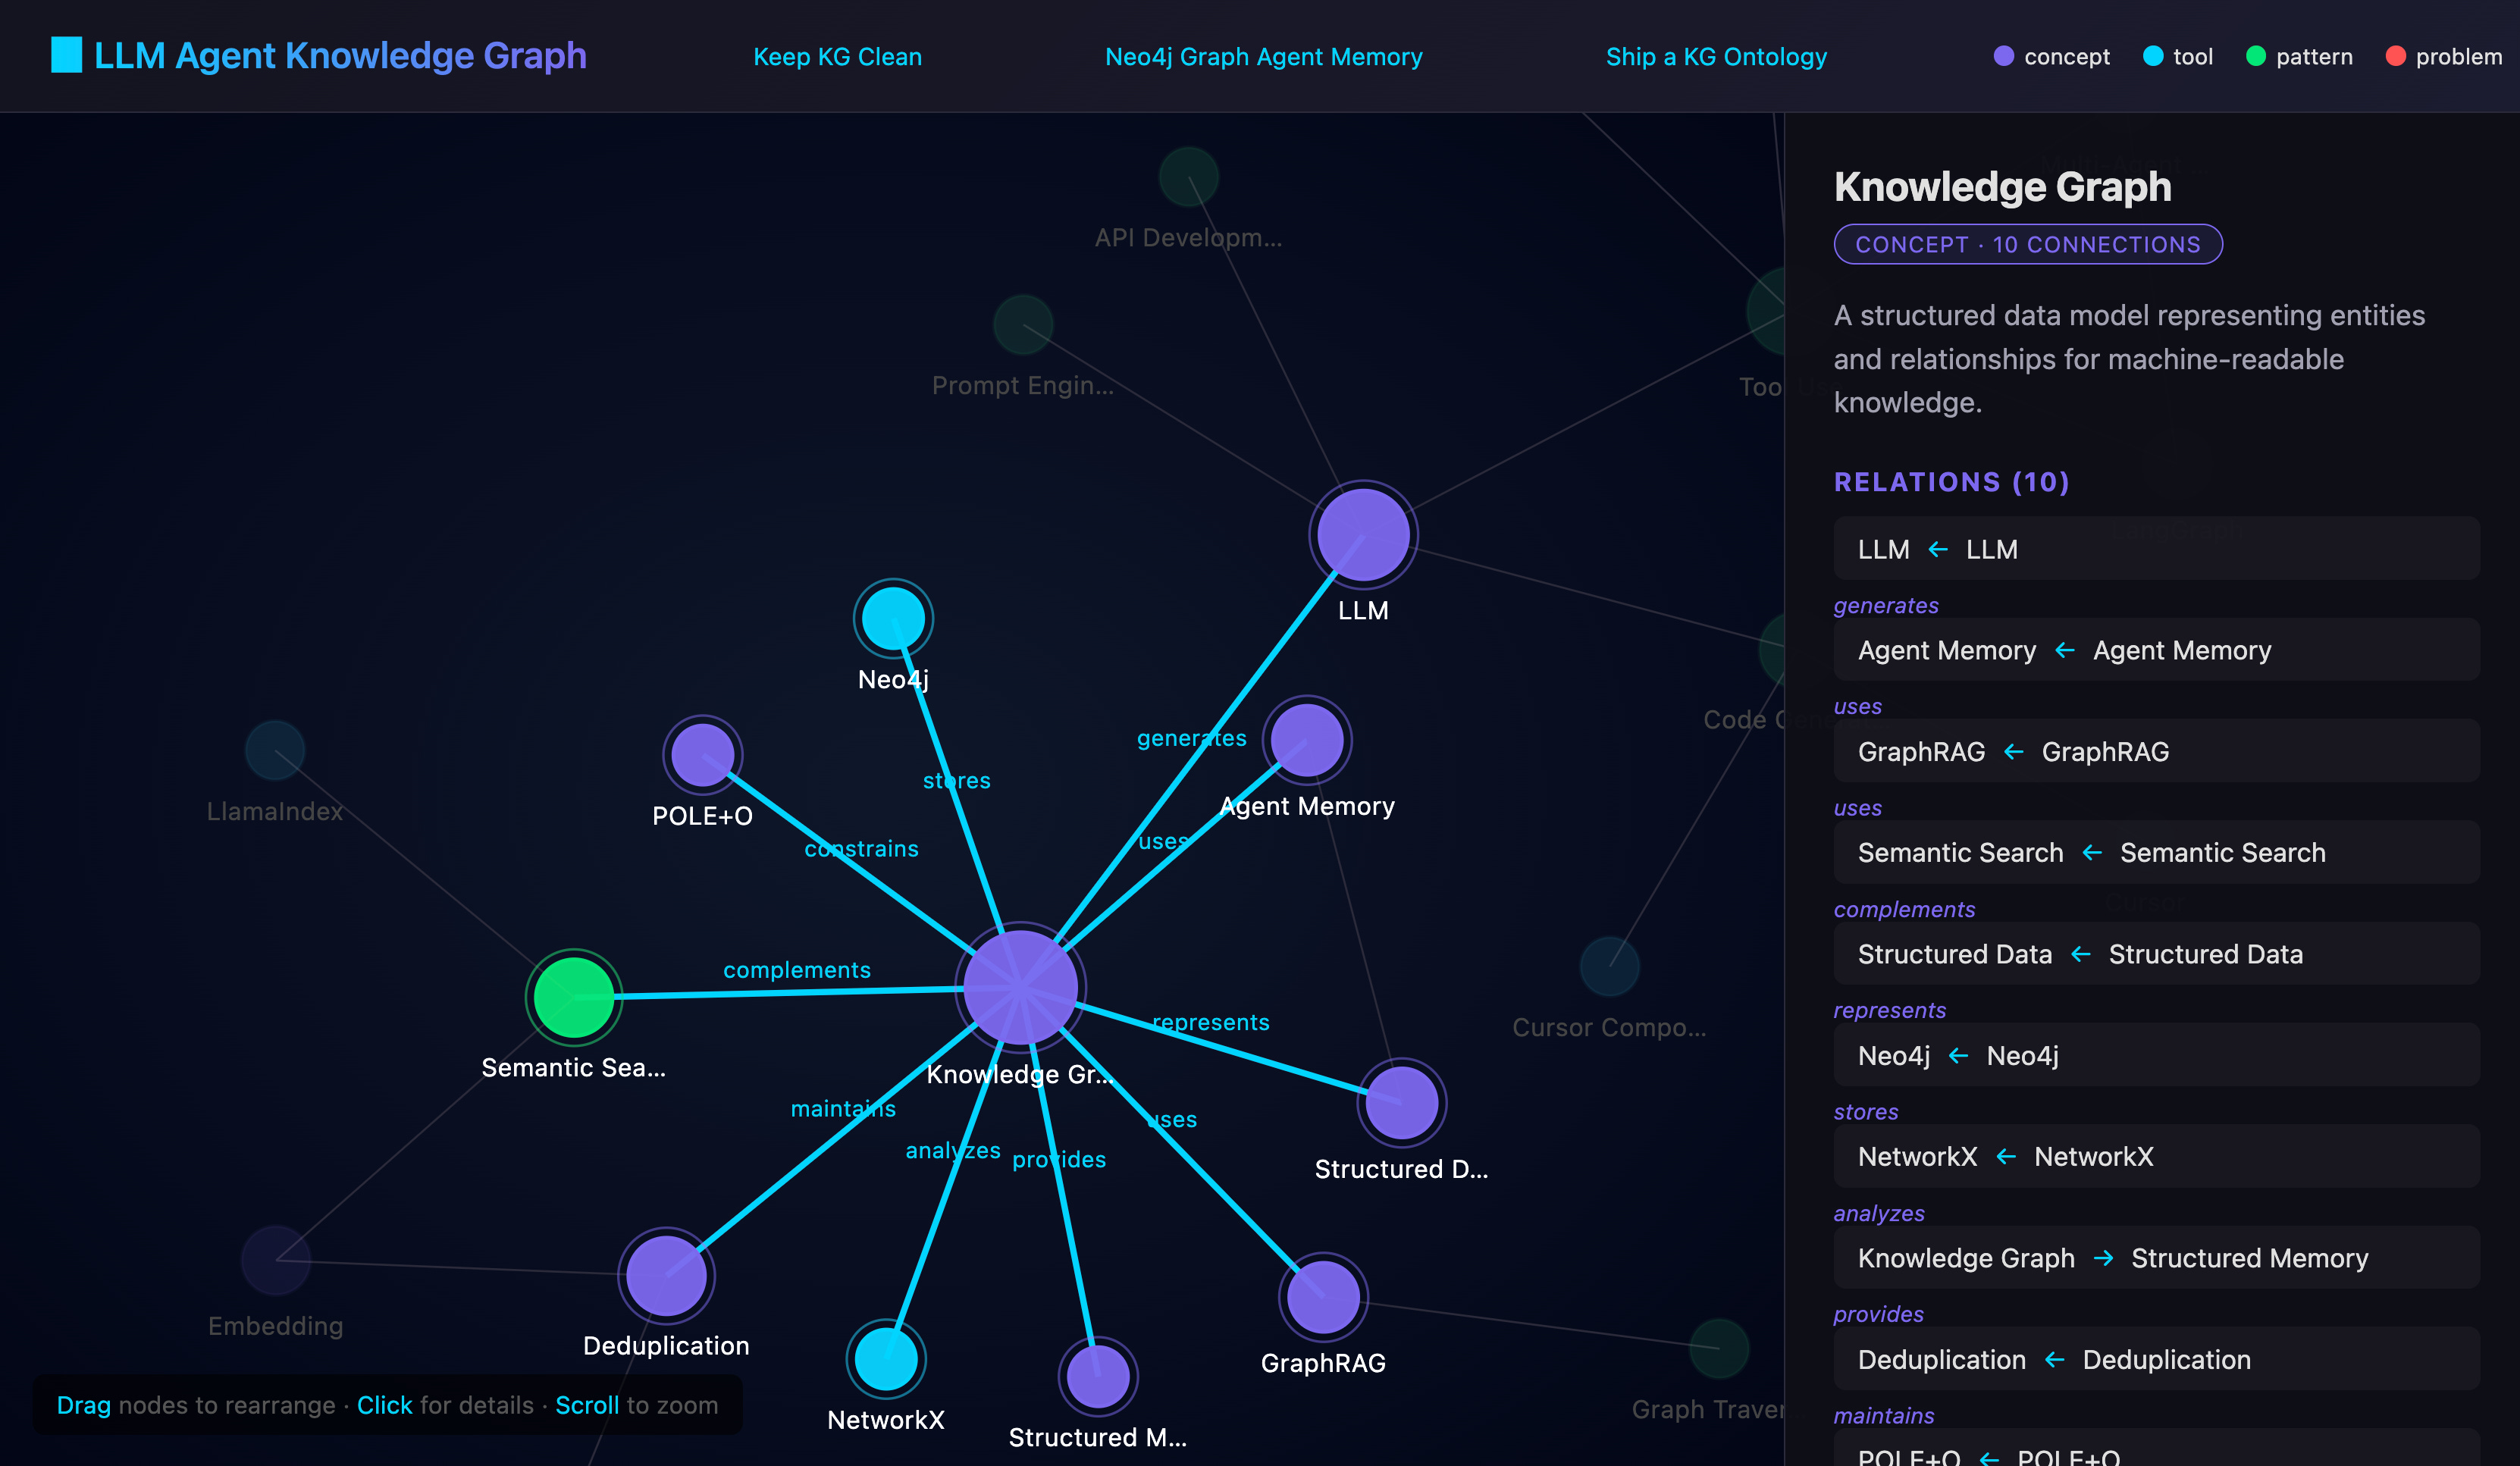
Or something more complex like scraping data from the internet, extracting a knowledge graph of entities and topics and rendering them into a cool visualization:
What if we want to run the agent remotely?
The Remote Mode
In the remote mode, we run the headless harness on Modal serverless functions. Now you can easily run Decode in the background without depending on your laptop and fully automate your agentic infrastructure.
You can trigger it from your CI/CD pipeline or Slack messages. A standard use case is to use cron jobs to pull tickets from Linear or Notion, launch one agent per ticket in parallel, and get notified when the implementation is done with a link to the ticket's PR.
Or even launch 3-5 implementations of the same ticket in parallel and let a frontier foundation model judge the candidates and rank them for you.
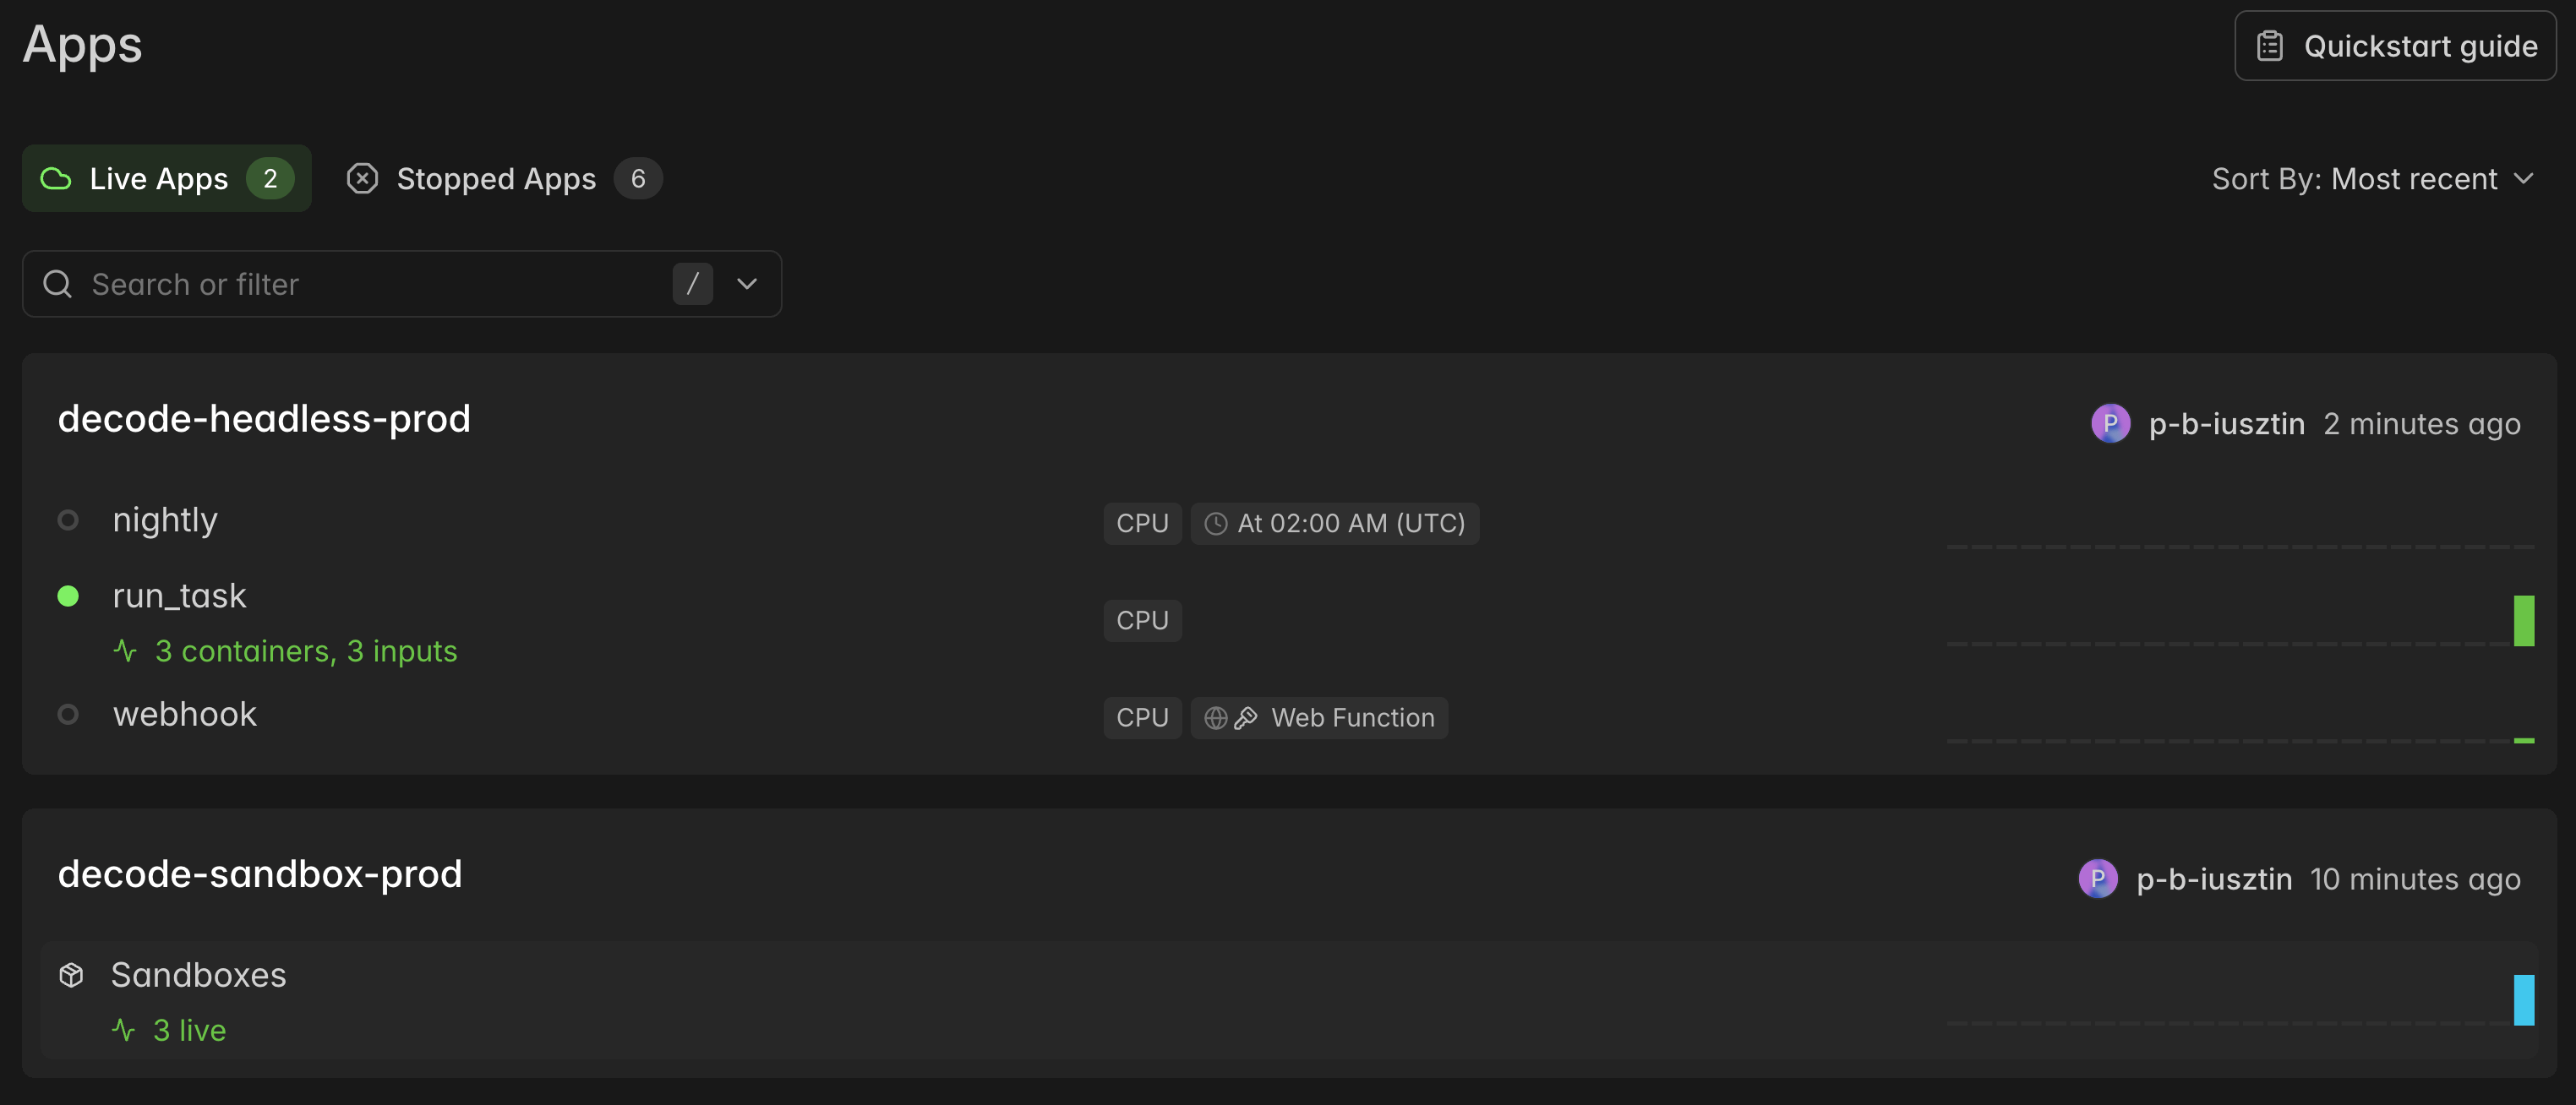
As in the image above, we will deploy decode as serverless functions on Modal, triggered via the CLI, webhooks, or cron jobs. The pros of this design are that you pay only for what you use, avoiding the need to run a server 24/7. Plus, because the LLM runs on a different inference endpoint and the tools execute within the sandbox, we can keep the application server extremely light.
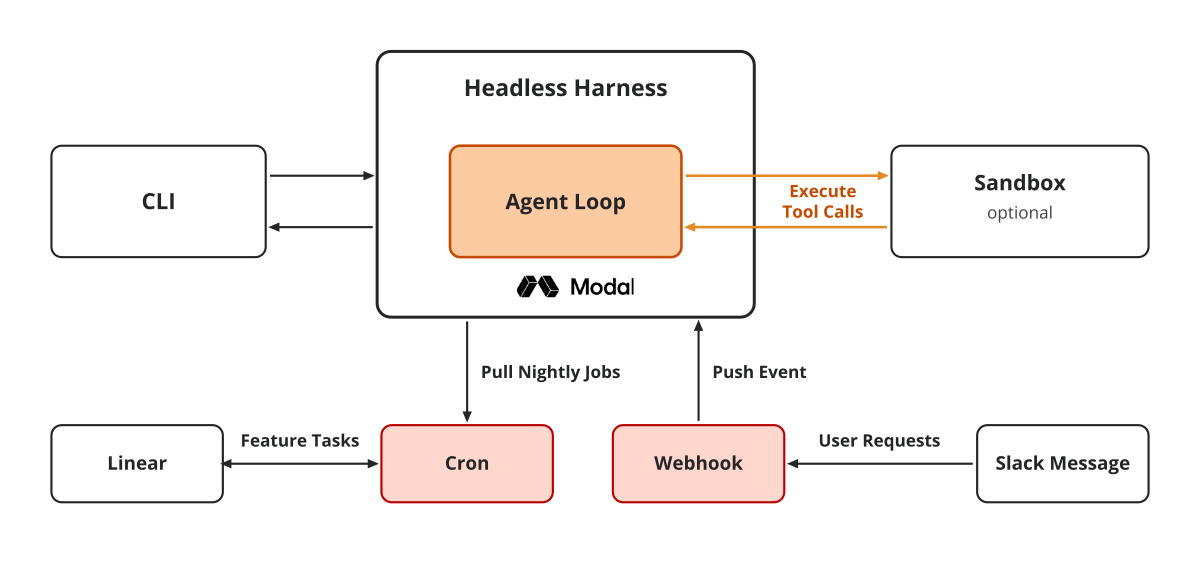
There are two core infrastructure components:
The execution layer, where the headless harness runs, is hosted on Modal.
The sandbox layer, where filesystem tools (read, write, edit, bash) execute, is deployed as Modal remote sandboxes. This is optional. If not configured, the filesystem tools run on the execution layer.
If a tool isn't flagged to run within the sandbox, it executes directly within the harness, which is fine for planning tools.
Try it out
You can run the remote version by going to our course repo and setting up Modal, following our Modal and sandboxing tutorials (takes ~5-10 mins). Then everything is as easy as running:
uv run decode remote deploy
uv run decode remote run "<task>" --repo <url> --sandbox-mode modal
One question decides whether this engineering is worth it: “Can you prove the agent works for my custom use case?”
The Observability and AI Evals Layer
The evals layer answers 3 questions, each with its own mechanism.
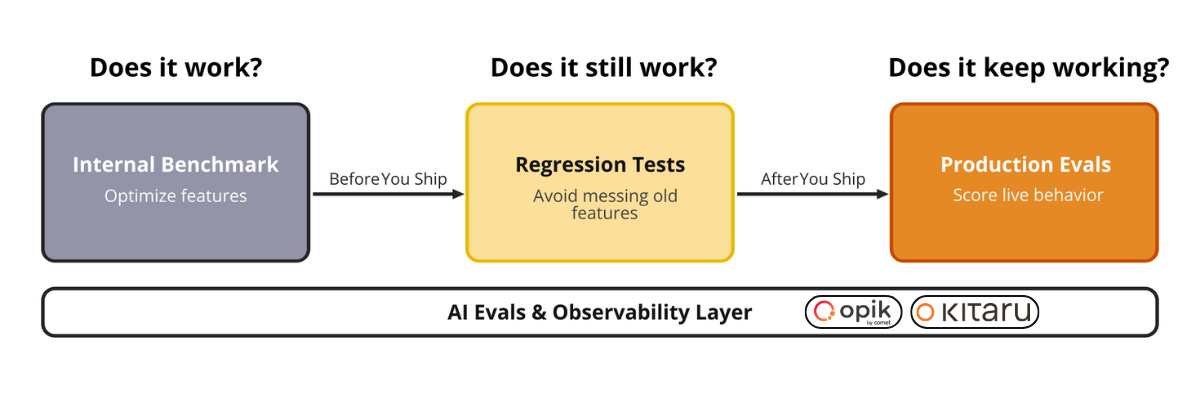
Internal benchmarks answer: “Does it work?” These are the metrics you try to beat with every new feature. You can use public benchmarks such as Terminal-Bench to compare your agent’s performance against others. But the real deal is to build a custom benchmark suite from your own tasks that optimizes for your specific use case.
Each case is a task instruction, a fresh sandboxed environment, and a hidden oracle test that decides pass or fail. One example case is “add a --json flag to decode run“, with a hidden pytest asserting the output parses. It’s the same pattern SWE-bench applies to real GitHub issues and Terminal-Bench applies to terminal tasks.
Your own tasks predict your agent’s usefulness better than any leaderboard.
Regression tests answer: “Does it still work?” Every new feature re-runs a regression suite and compares scores against the baseline, so a prompt tweak or a new tool can’t silently make the agent worse.
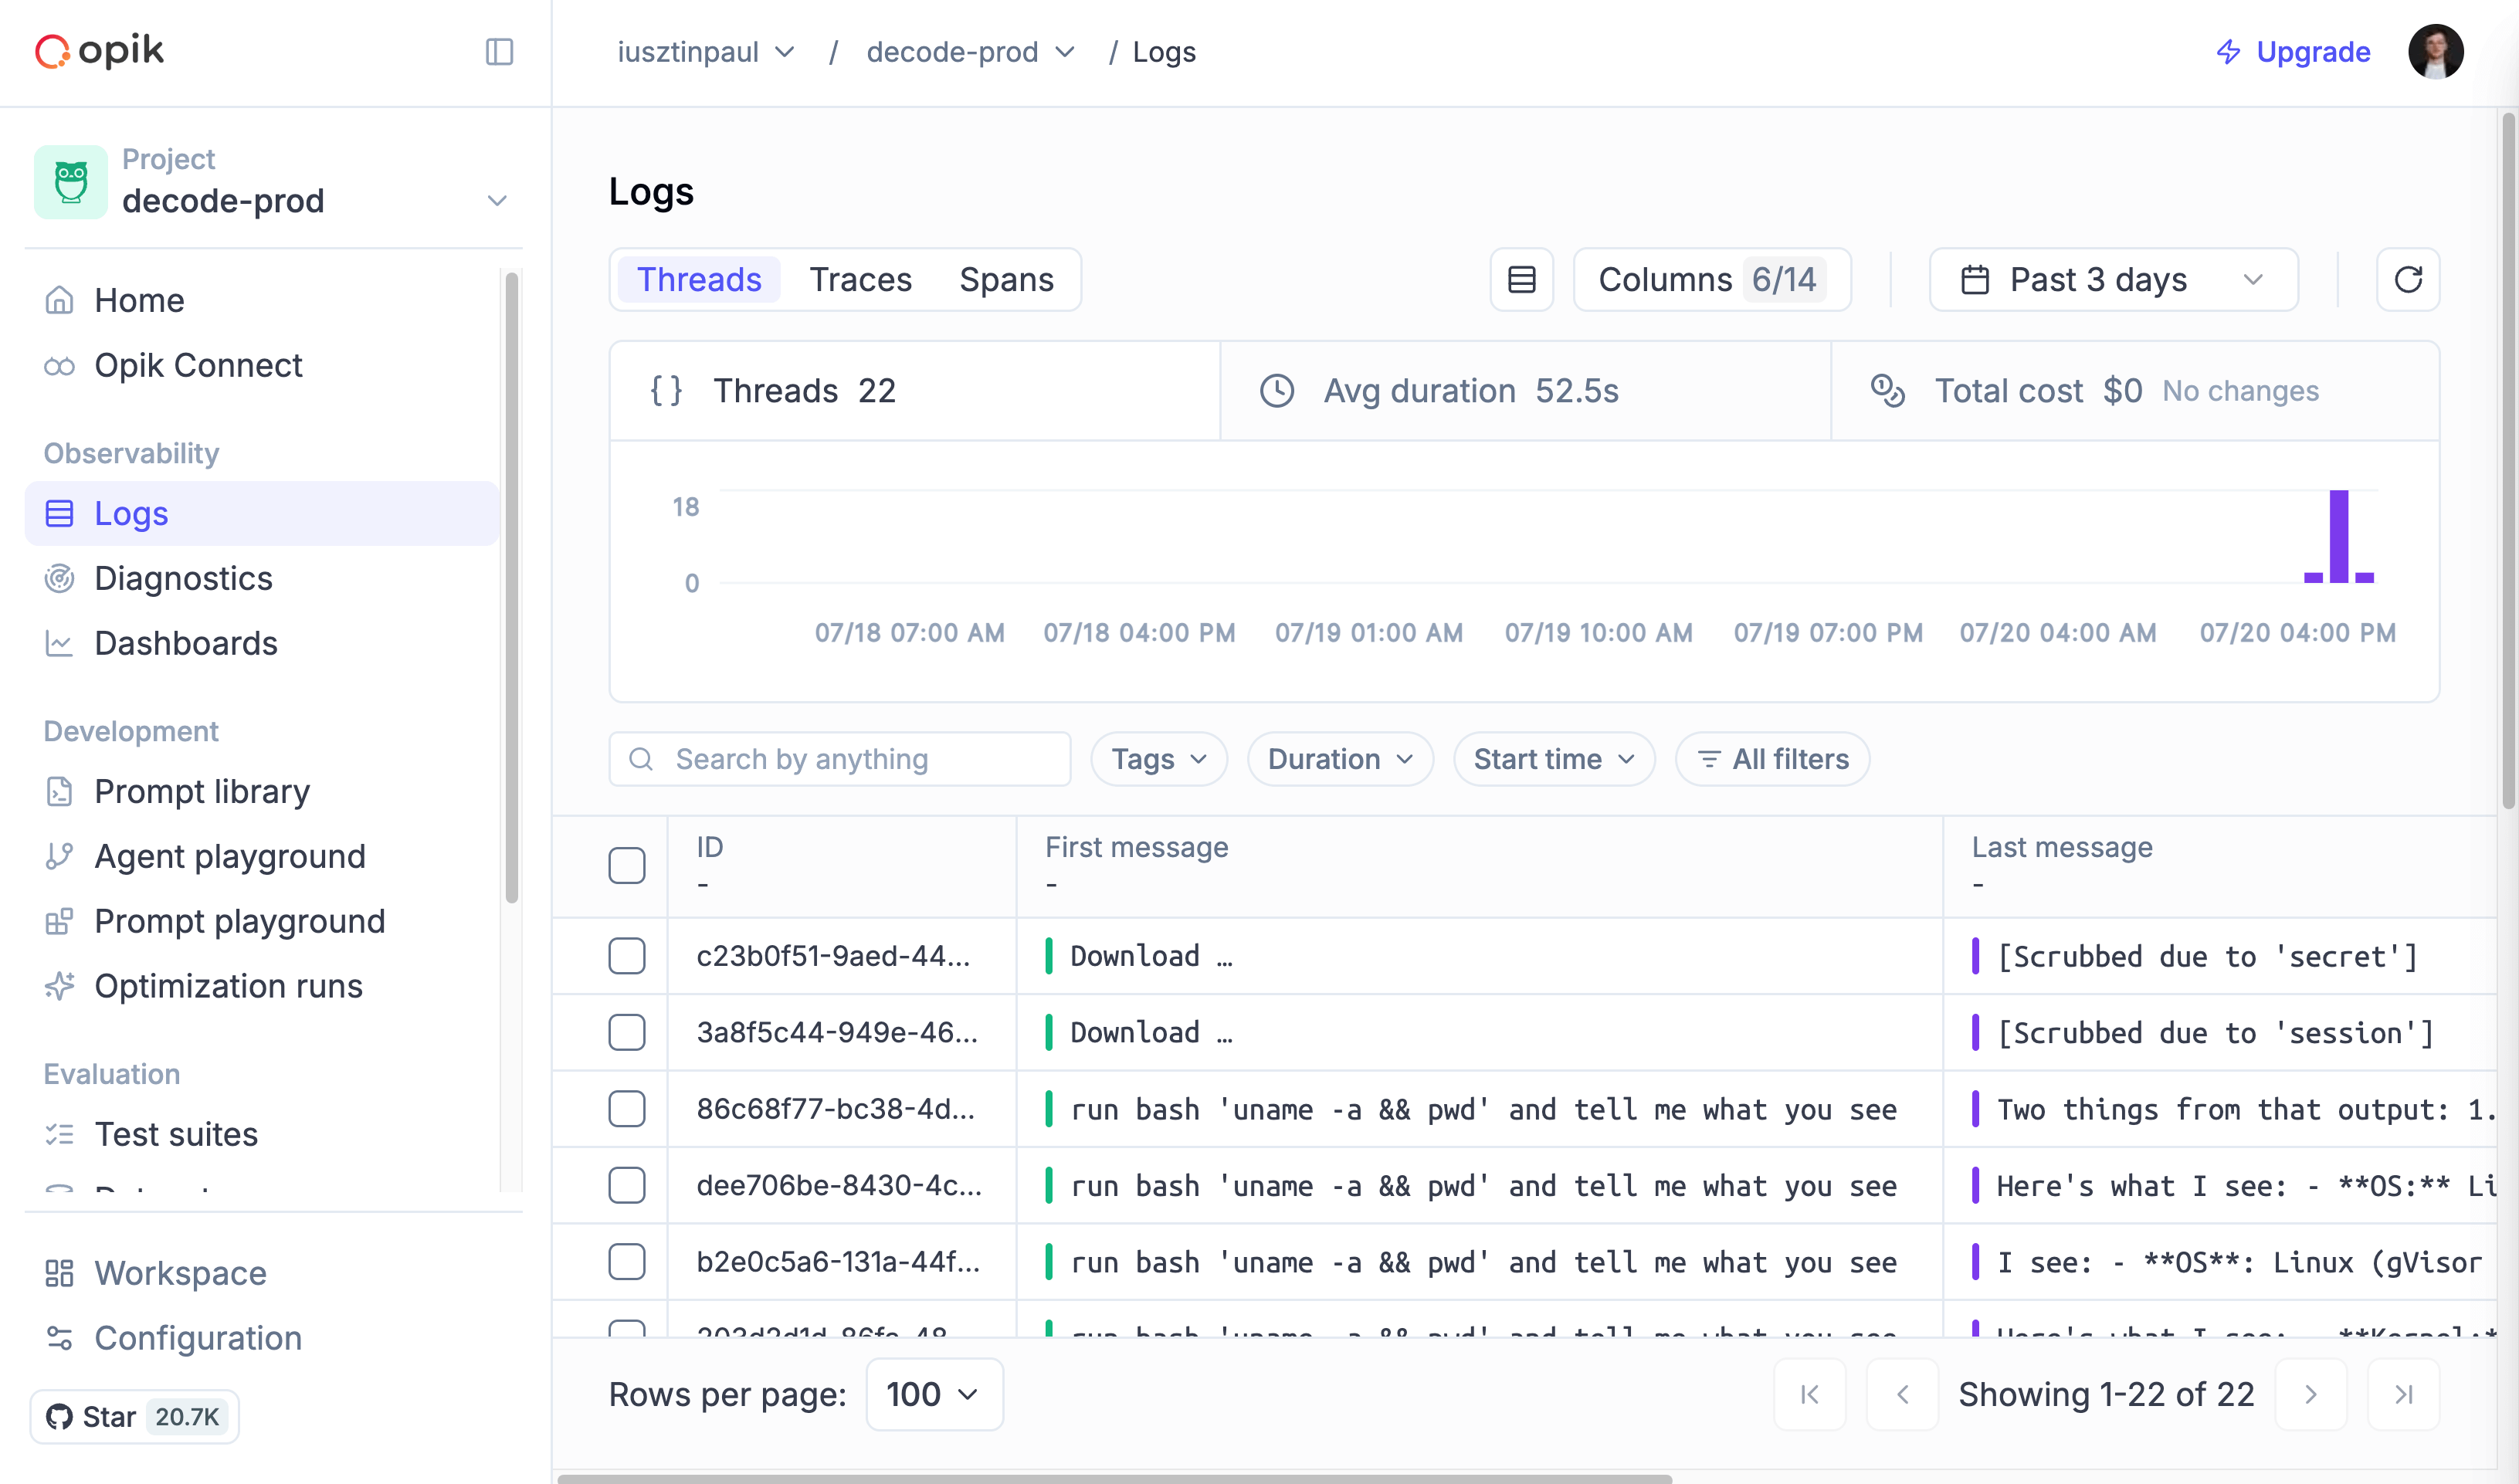
Production evals: “Does it keep working?” Every session is traced with Opik, Comet’s open-source LLM observability platform: each model call, tool call, and token count is a trace, while the conversation is logged as a thread. Live scoring tracks quality in production, where you run a bunch of AI eval metrics on sampled traces to detect unwanted behavior and create warnings or alarms.
To implement all three cases, plus to monitor and store all our traces, we will use Opik as our evaluation harness and observability platform.
AI Evals on Steroids
With tools like Opik, you can only evaluate existing traces, but you often want to answer questions like: “What would have happened if I used a different model or reasoning level?”
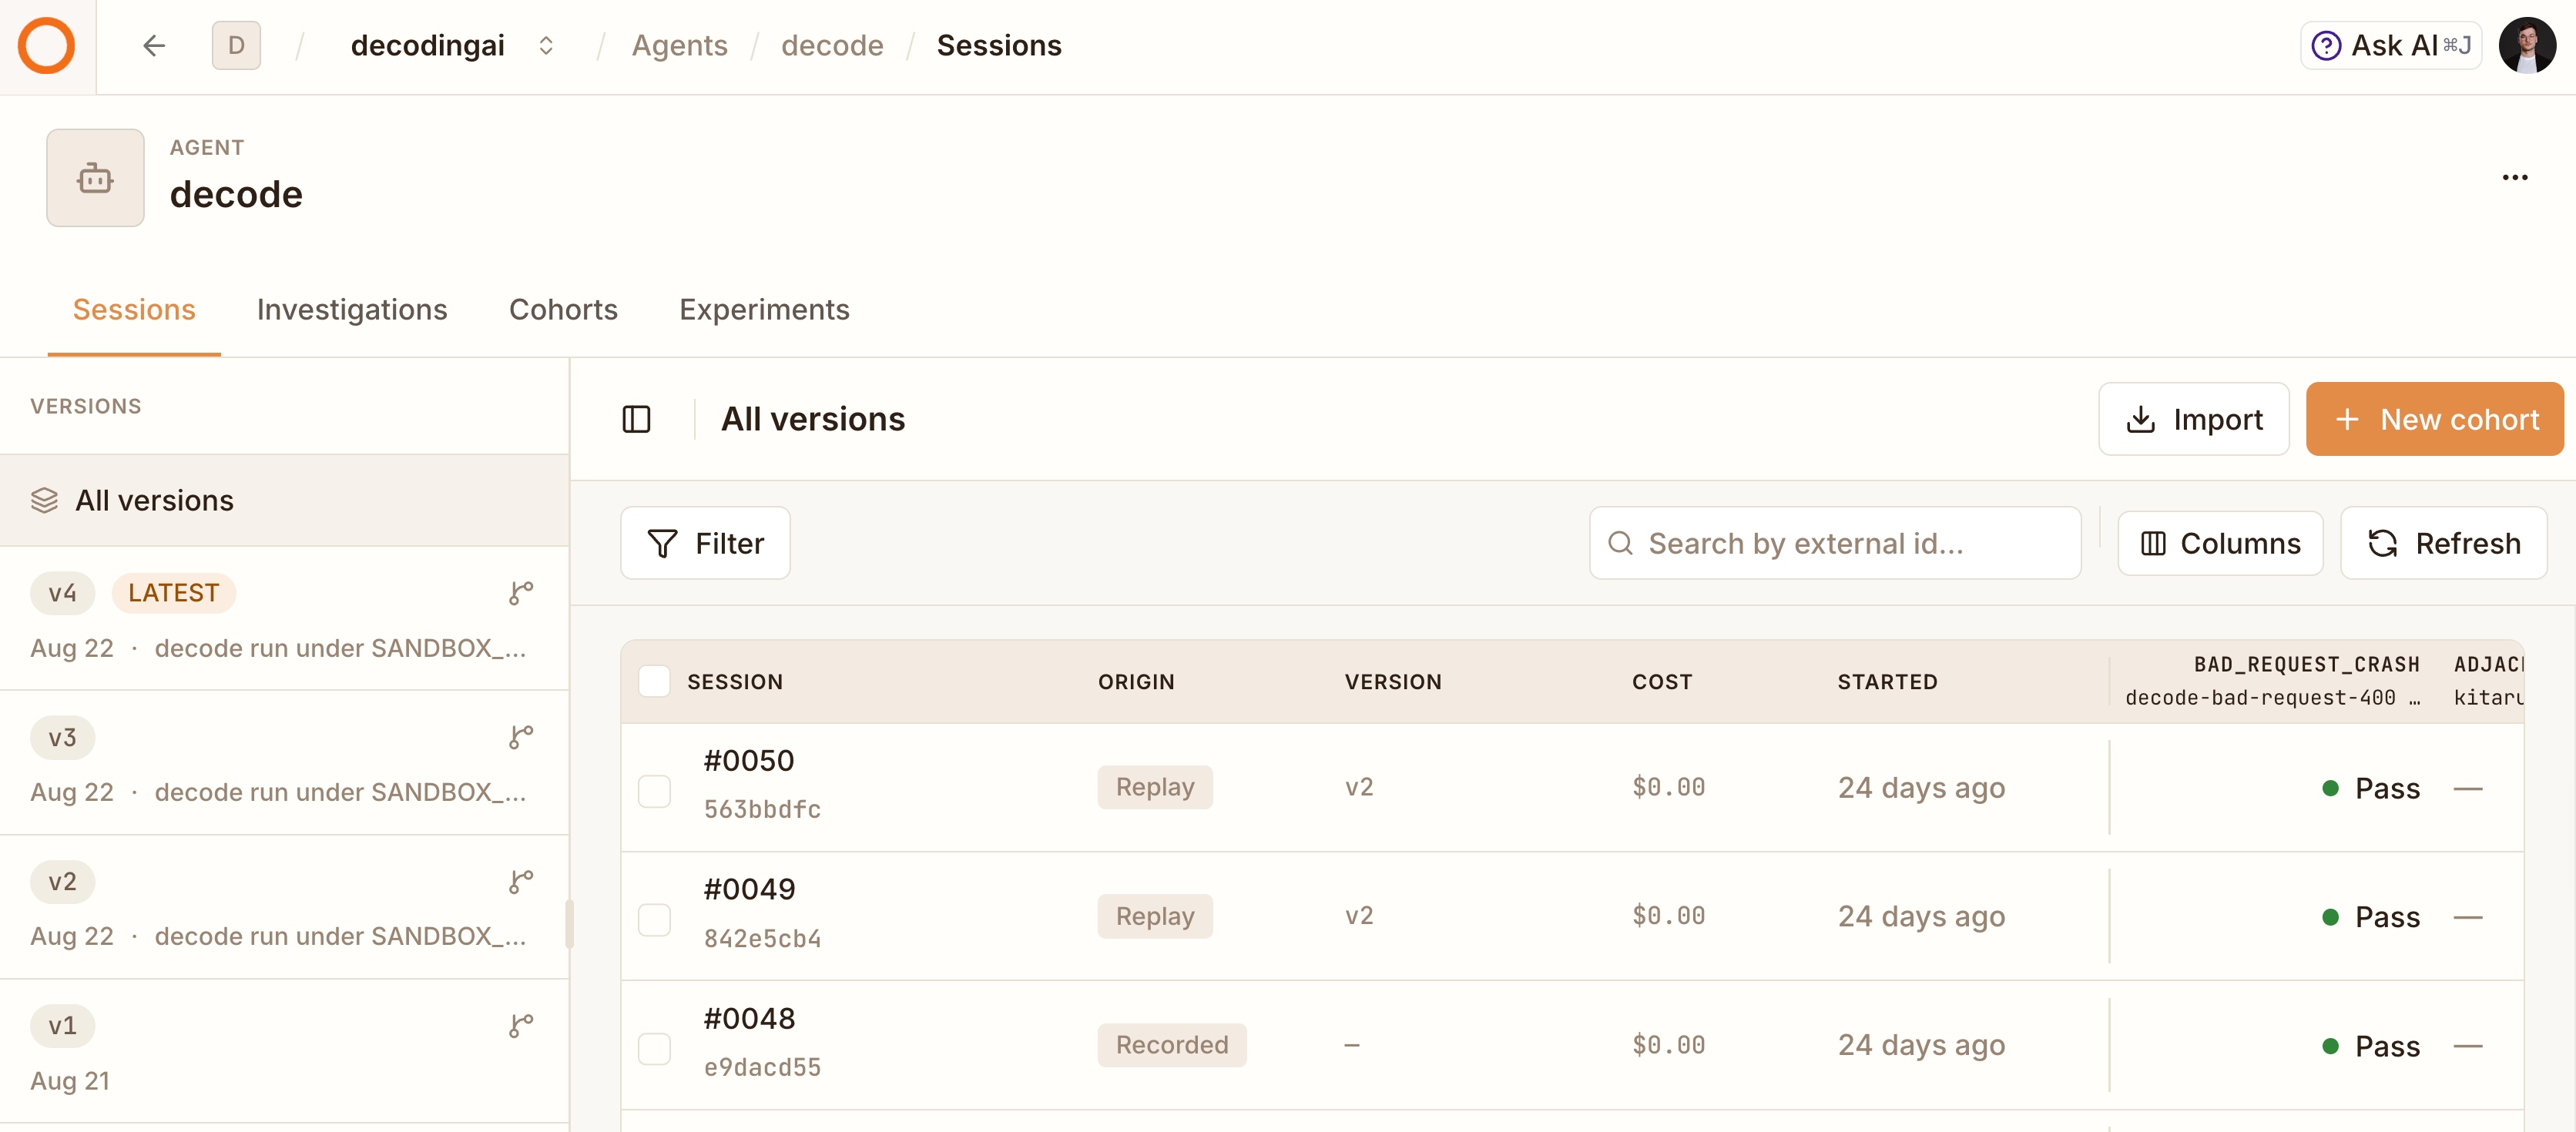
That’s why a popular strategy gaining traction is replays, via tools like Kitaru. You take a recorded trace, change one thing (the model, the system prompt, a parameter), and re-run the whole session from the top, then compare it against the unchanged run as your baseline.
The tools don’t execute again by default: when the replayed model makes a tool call that matches one from the original session, it gets the recorded output. When it calls something new, the policy you pick decides what happens: return an error so the model has to adapt, or run the tool for real. This way, you can isolate the impact of a single change on the model’s decisions, and replays cost no sandbox time.
Applying this strategy can drastically speed up exploration when optimizing your coding agent, whether you're trying to squeeze better scores on your benchmarks or find edge cases in your regression tests. You can also run error analysis on your results to detect and fix the most frequent and/or important errors.
Kitaru works in parallel with Opik. You can import all your traces from Opik or plug in a Kitaru adapter on top of your agent loop to collect them.
Next Steps
You’ve seen a bird’s-eye view of what a coding agent looks like: one headless core, a small tool-calling agent inside a much larger harness, 2 modes, and an evals layer that measures performance.
🧑💻 For the best results out of this series, clone the course repo, follow the installation steps, and run it while you follow along.
In the next lesson, we get into the code and start building the agent loop hooked into the TUI.
Here is the course roadmap, lesson by lesson (see all in GitHub):
Building a Coding Agent From Scratch ← you are here
Or watch the video lecture that supports the first two lessons:
But here is what I’m wondering:
Which part of your daily coding agent is still a black box to you: the loop, the sandbox, the memory, or something else?
Click the button below and tell me. I read every response.
Enjoyed the article? The most sincere compliment is to restack this for your readers.
Special thanks to Modal, Opik (by Comet), and Kitaru (by ZenML) for sponsoring this open-source course and keeping it free!

Whenever you’re ready, here is how I can help you
Go from agent user to agent builder. Master the foundations of AI agents and turn fragile demo code into reliable, production-ready systems with my course, Agent Engineering: Building Multi-Agent Systems (made with Towards AI).
35 lessons. Pure foundations from scratch. 4 mini-projects. 2 production systems. A certificate and direct access to me & industry experts in our Discord.
Built for software and data professionals transitioning into AI engineering. Rated 5/5 with 300+ students. The first 7 lessons are free:
Not ready to commit? Start with our free Agent AI Engineering Guide, a 6-day email course on the mistakes that silently break AI agents in production.
Images
If not otherwise stated, all images are created by the author.
The steering queue is the detail people skip. A model that can’t accept a correction safely mid-task isn’t very useful, no matter how well it benchmarks.
my local agent has trouble with tool calling... it simply refuses to do it most of the time. or it thinks it is too smart to lower itself to tool calling and prefers to give answer itself.... also want to know more about how to make agent create plan and then have it gradually implemented without getting stuck...